The most basic starting point for new guns and new gun owners! These gun operations will give you a crash course in everything from cleaning to shooting, including aiming, drawing a firearm, and more.
We’ve broken this down and made it as easy as possible so hang on tight, this is a lot of education coming at you!
Basic Gun Operations
If this is your first foray into guns, you need to know some basics. The first of those is safety and that starts with the 4 rules of gun safety.
- Treat all guns as if they are always loaded.
- Never let the muzzle point at anything that you are not willing to destroy.
- Keep your finger off the trigger until your sights are on target and you have made the decision to shoot.
- Be sure of your target and what is behind it.
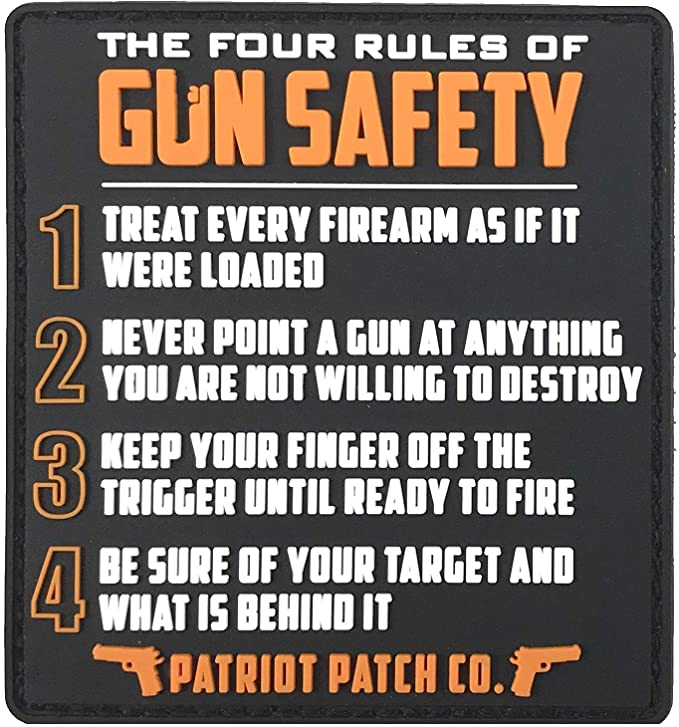
Now, these rules seem like common sense, at least they should, but following these rules strictly will keep you alive.
Don’t even consider handling a firearm until you know, understand, and can enact these rules.
Failure to do so can get you or someone else killed.
Once you’ve taken these rules to heart, there are some other basics you’ll want to know.
How To Clean A Gun
When To Clean
The first question most new owners ask is when and how often should they clean their guns.
Truthfully, the answer kind of depends.
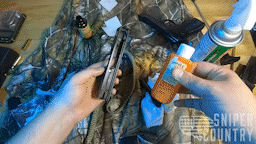
Right off the bat — cleaning a firearm is the first thing you should do before anything else once you get it home.
Guns are normally packed and shipped with grease or oil that is designed to preserve the firearm, not to act as a lubricant during operation. Cleaning that off and applying fresh oil/grease is important for reliability. Never skip this core step to gun operations.
You also want to clean off anything left over from the manufacturing process while giving yourself a chance to get close with your major parts to give them a once over.
After that, when you clean is kind of up to you.
If you want to be the type of person that cleans their gun every time they use it, go for it. If you want to give your EDC a wipe down every night, go for it. Or if you’re like me and you want to ignore your gun until you absolutely NEED to clean it, that is totally okay also.
Personally, I clean my EDC guns fairly often — at least once every two weeks regardless of if I took it to the range or not.
For everything else, I basically ignore them until they start to malfunction or lose accuracy. And yes, that includes my very expensive precision long-range rifles too.
What To Clean
Fundamentally cleaning any firearm is basically the same thing, just slightly different in how you go about it.
That said, cleaning is pretty easy. Field strip your firearm (how depends on what it is) and… clean it. That’s it. Take it apart, clean anything that is dirty.
Okay, here are a couple of examples.
Pistols
But first, you’ll need a cleaning kit.
For just pistols, I like the Real Avid Gun Boss if you want to patch clean.
For a pull-through cleaning system, you can’t beat Hoppe’s BoreSnake.
“Field stripping” is breaking your gun down to its basic large parts. You’re not taking every screw and pin out, you’re just breaking it down so you have large parts.
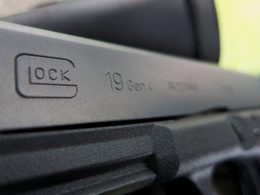
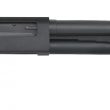
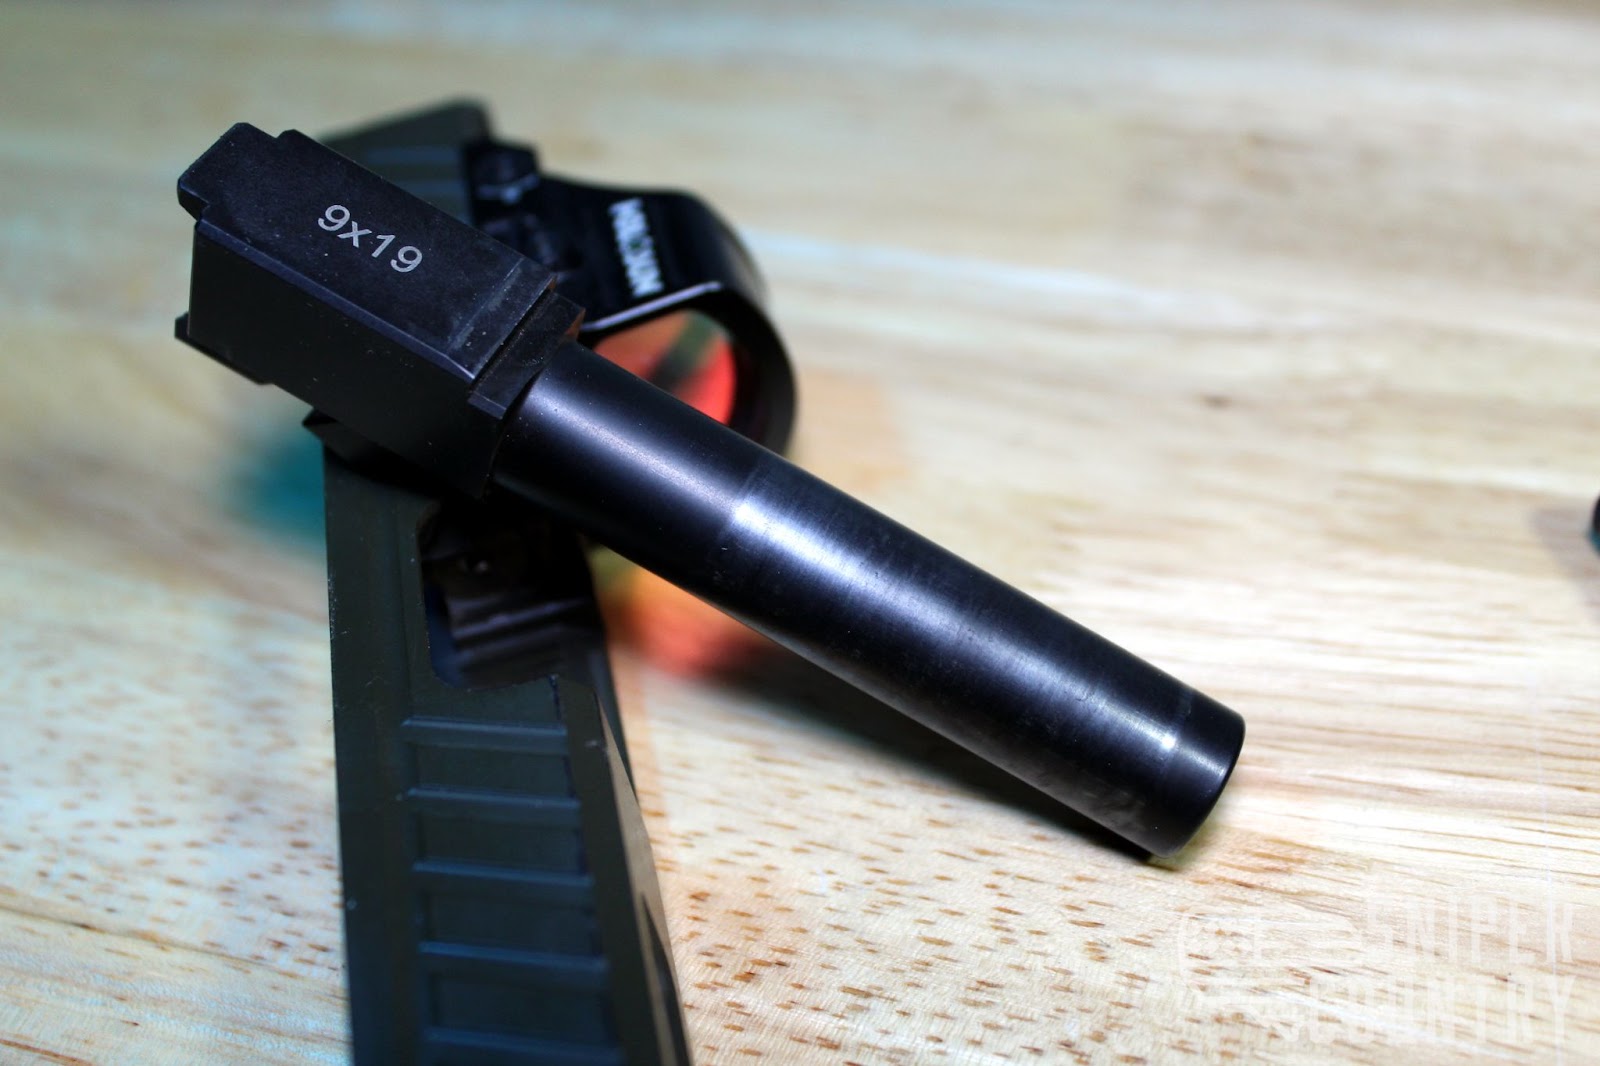
This is my Glock 19 field stripped.

Pistol frame that includes the magazine well, light, and trigger. Recoil spring, barrel, and slide.
The frame you can basically ignore outside of a wipe-down. There will be dust and crud in the magazine well, but it’s basically impossible for this to impact anything. Wipe it out if you feel like it, but I ignore it 99 times out of 100.
Focus on the barrel, slide, and recoil spring.
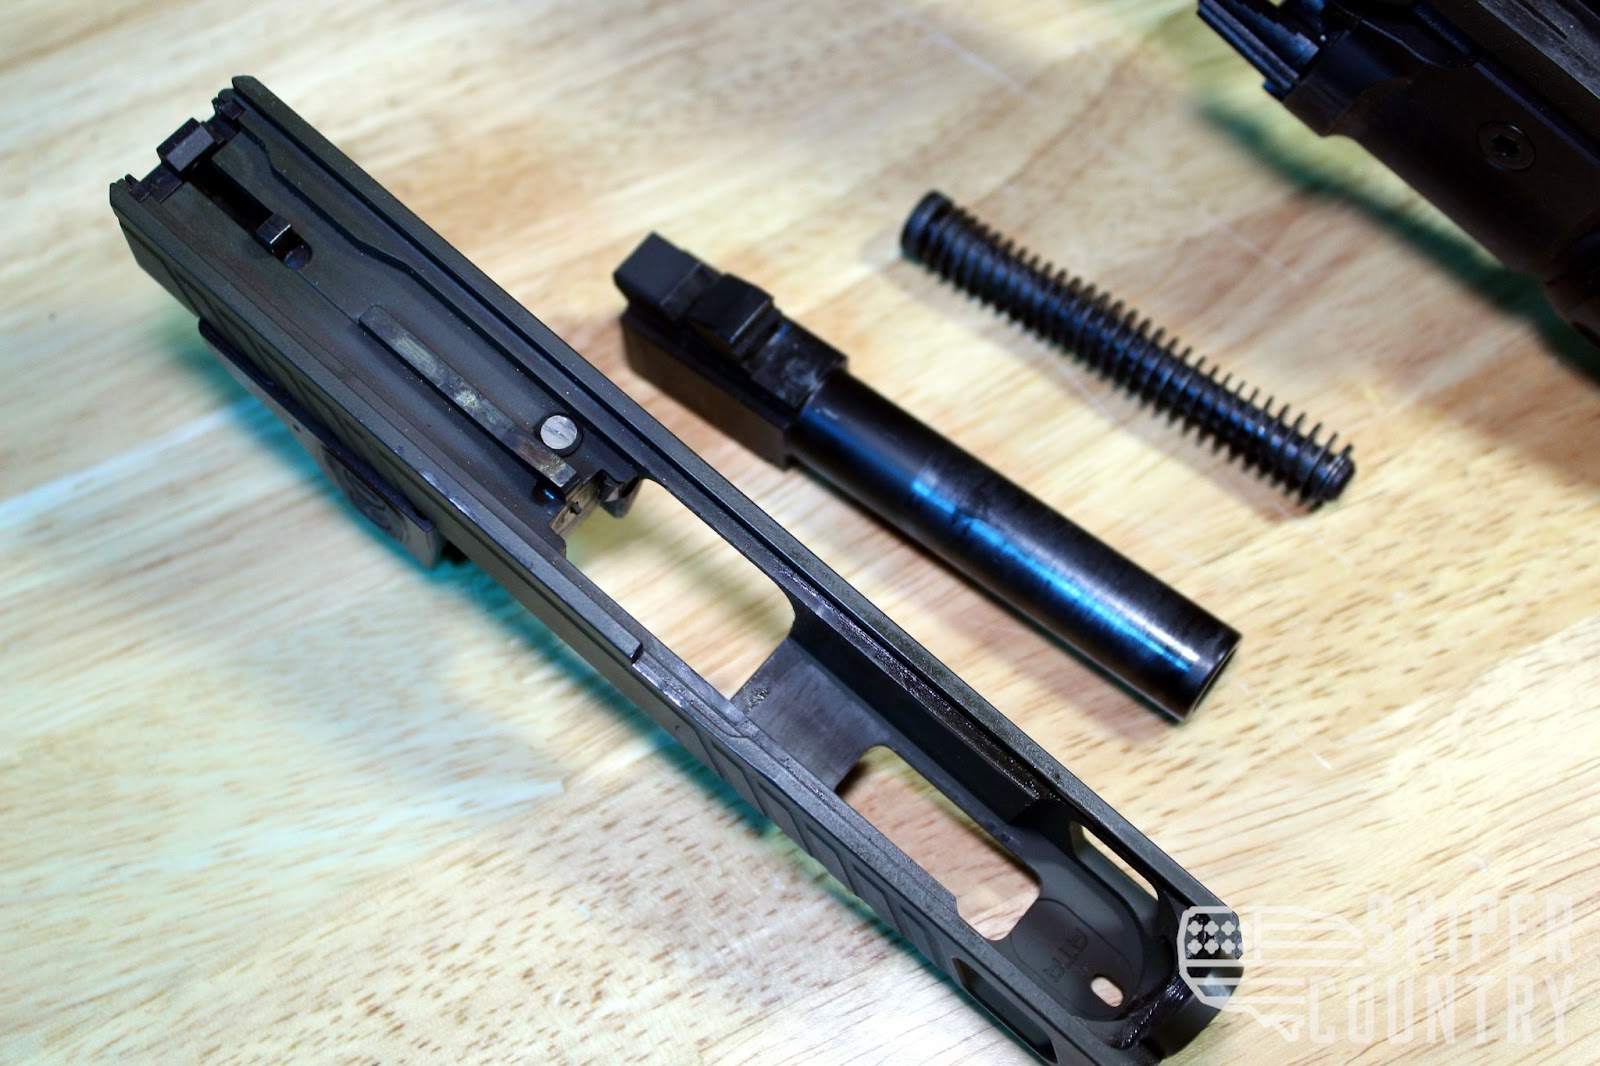
See how dingy grey it is under there? Clean it! Even this dirty it won’t impact function, but it’s good to clean anyway.
Really what I want CLEAN is inside the rails so the slide moves freely and easily.
The barrel is also critical. Anything that is shiny from wear, wipe it down well. Any surface that touches another surface, wipe it down and scrub it if you need to.
Don’t forget the breech face and chamber!

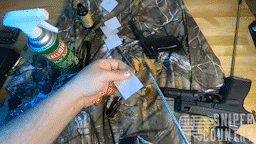
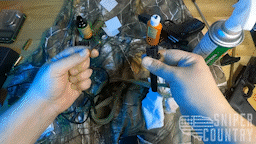
Wipe it ALL down. Scrub it. Using a cleaner like Ballistol, Hoppe’s, or Break Free CLP will go a long way in helping get it all. I also recommend a nylon brush.
Rifles
For an all-in-one rod system, Gloryfire Universal Gun Cleaning Kit is great.
For a bore-snake, again just get a BoreSnake! This time in Rifle lengths.
This really isn’t much different from pistols, fundamentally. Field strip it, and clean it. Guns all work basically the same way, the same things get dirty, the same things need to be cleaned.

Above are three bolts, left to right they are the bolts from a Sig Sauer Cross bolt-action rifle, a Chinese-made copy of the SKS, and an AR-15 BCG.
Basically, they have the same jobs in their rifles, but they accomplish those jobs slightly differently. For cleaning, they are basically the same.
Bolts need to be wiped down, bolt faces need to be scrubbed, and anything dirty can be cleaned off.

The main difference for rifles is that bolts/bolt carriers can often be broken down into more parts. While a pistol normally doesn’t have a locking bolt or anything and so only have the breech face and the barrel to clean.
If your bolt does come apart, do so and… you guessed it, clean it!

Rifles also normally have a more complex barrel and chamber area. These can be harder to clean simply because they are harder to get at. Depending on your rifle, this might be easier or hard. Either way, it needs cleaning. Not the most fun part of gun operations, but it has to be done.

Cleaning Your Barrels: Bore-Snake Vs. Patches
For inside the barrel, there are two options: bore-snakes and patches.
The old standard has always been with patches. You take a patch of cotton, wet it with some solvent, stick it on a long rod and shove it down the barrel.

Depending on how dirty the barrel is, you’ll do that one or twice or ten or more times. Each time it gets cleaner and cleaner.
The patch method is tried and true, but it isn’t cheap and it requires you to keep buying more stuff over the long term. You need a rod, patches, maybe a chamber guide, and it can take a while for things to get clean.
There is a newer way, some claim this isn’t a good method but those people are wrong. Bore-snakes are basically rope. The first length is like paracord with a brass weight on it, you feed that down the barrel and out the muzzle so you can pull on it.
Attached to the paracord is nylon rope sized for the caliber it is built for. Some will also have brass bristles embedded into the front few inches of rope.
As you pull the paracord, the main section of rope follows along and cleans the barrel.
The advantages of bore-snakes are they are super easy to store, super easy to use, get the barrel clean in less time and less effort, and are washable so you don’t have to keep buying things (personally, I don’t wash them. It takes a LONG time for one to get too dirty to use and by that time I rather just get a new one).
However, something that advanced users can use a patch for is to learn things about their barrel. The color of the solvent coming out can tell you if you have a lot of copper in the barrel or a lot of carbon, if one section is dirtier than another, etc.
That is a very advanced user-type thing though and really doesn’t matter to 99% of shooters.
Personally, I strongly recommend bore-snakes. For 99% of cleaning and 90% of users, the bore-snake makes the cleaning process super easy and super fast. Maybe not the most exciting part of gun operations but at least a bore-snake makes it better!
Don’t Forget To Oil!
After you’re done cleaning — OIL YOUR GUN!
If you live in a humid area you’ll want a very light coat of oil over EVERYTHING. Outside and in. If it’s metal, coat it.
For people in dry areas, this isn’t as big of a deal.
Either way, you’ll want to oil the wear parts to reduce friction. Kind of like when cleaning you cleaned anything that was dirty, when oiling you’ll want to oil anything that has wear marks or is shiny.
The exception to this are triggers and inside firing pin channels.
A lot of people oil their triggers and they really shouldn’t unless the trigger manufacturer tells you to. They don’t really wear much and reducing their friction could cause an unsafe trigger.
Firing pin channels is the same way, they don’t wear or rub much, and oiling them can clog them up or freeze them rendering the gun unsafe or unusable.

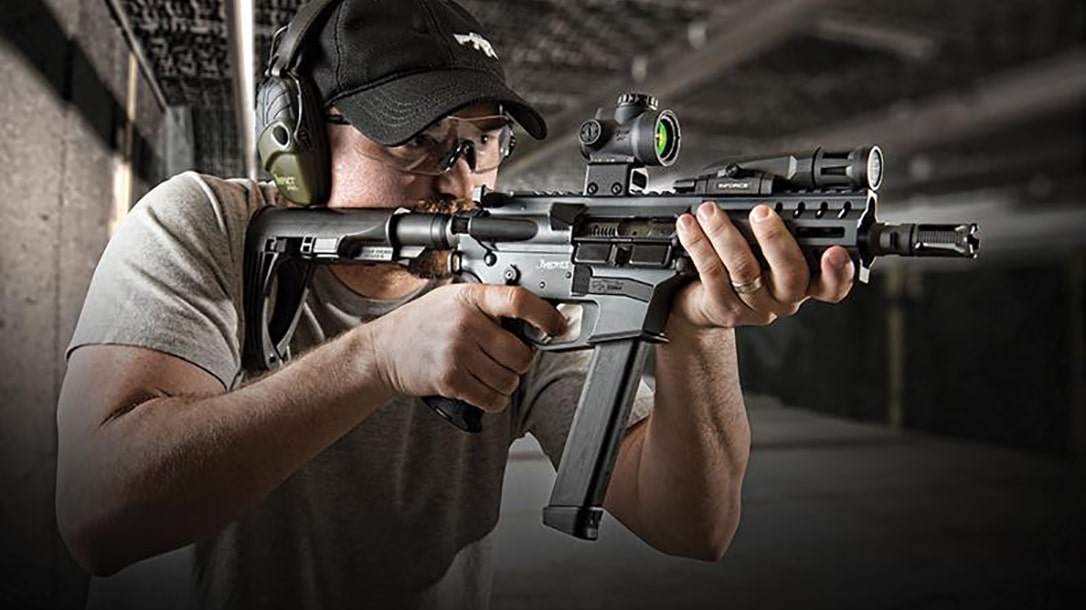
How To Hold A Gun
There is no substitute for good instruction from someone right there to show you in person, but hopefully, we can get you ready for that or at least make your first time at the range a little less intimidating.
Don’t worry about being perfect in your gun operations and handling, being safe is the top priority.
Pistol
The number one thing about shooting a handgun is to forget everything you’ve ever seen on TV. I can count on one hand the number of TV shows and movies I’ve seen where they correctly held their firearms. Everything else is trash.
We’ll start with hand placement.
Your dominant hand should be as high on the pistol grip as can be without extending past the pistol grip. Sometimes this is easier said than done depending on the pistol in question.

My Glock 19 Gen 3 I can over-extend myself and get bit by the slide.

This Beretta 92FS doesn’t have that problem.
Once you get a tight, high grip, use your other hand to fill in the empty space — palm first, then wrap your fingers around the front.

This gives you a very firm 2-handed grip. Basically, all other styles of holding a pistol are inferior to this. Although, sometimes you need to modify this grip slightly depending on your hand size and the size of the gun.
However, the basics are still the same. Get as much skin-to-gun contact as you can and hold on tight.
Rifle/Shotgun
While there are other ways to hold a rifle well, this is what I’m going to teach you as a basic one-size-fits-all kind of style.
This is geared towards accurate shooting, comfortable shooting, and being free to move around.
This is not a super-high-speed tactical way of shooting and I’m assuming you’re not wearing plates.
Be it rifles or shotguns, the first rule is to get the stock tight into your shoulder. Using your strong side, get that stock in TIGHT to the shoulder pocket.

A tight fit will dampen recoil more and keep the rifle locked in where you need it to be.
Your off-hand will be extended forward and gripping the handguard.

If this is an AR-15 style rifle, I strongly recommend a C-Clamp grip.
Make a C with your hand, wrap it around the forend of the rifle, and grip it down tight. This gives you a lot of freedom of movement but also a really tight and solid platform to aim with.

This grip works for an AR-15 or other similar rifles because you are protected from the barrel by a handguard.
Do not EVER use this grip if you are touching the barrel. You’ll burn yourself.
If you can’t use a C-clamp grip, just hold the stock like you normally would.

How To Shoot A Gun
Again, I strongly recommend one-on-one training with a good instructor or at least a group class. But to get you started let’s talk about aiming.
Aiming with irons and with red dots are the same be it a pistol, shotgun, or rifle. What matters is the sights, not the weapon.
Iron Sights
This is the classic method of aiming a firearm. While at one time the pinnacle of technology, these days iron sights are like a manual transmission on a car. It works, it works well, but there are easier options.
Some will tell you that you NEED to learn irons before anything else, but that is again false. Like a manual transmission, you really don’t need to learn how to use one before getting in a modern car.
That said — it’s pretty simple, but hard to master.
The first thing to keep in mind is that you’re focusing on the FRONT sight. The target and the rear sights will be out of focus and blurry, what you need to be in focus is your front sights.
This feels very counterintuitive to most people, but it’s the way it works.
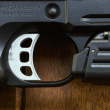
Once you’re focused on the front sights all you need is equal height and equal light.

What this looks like in the real world is like this:
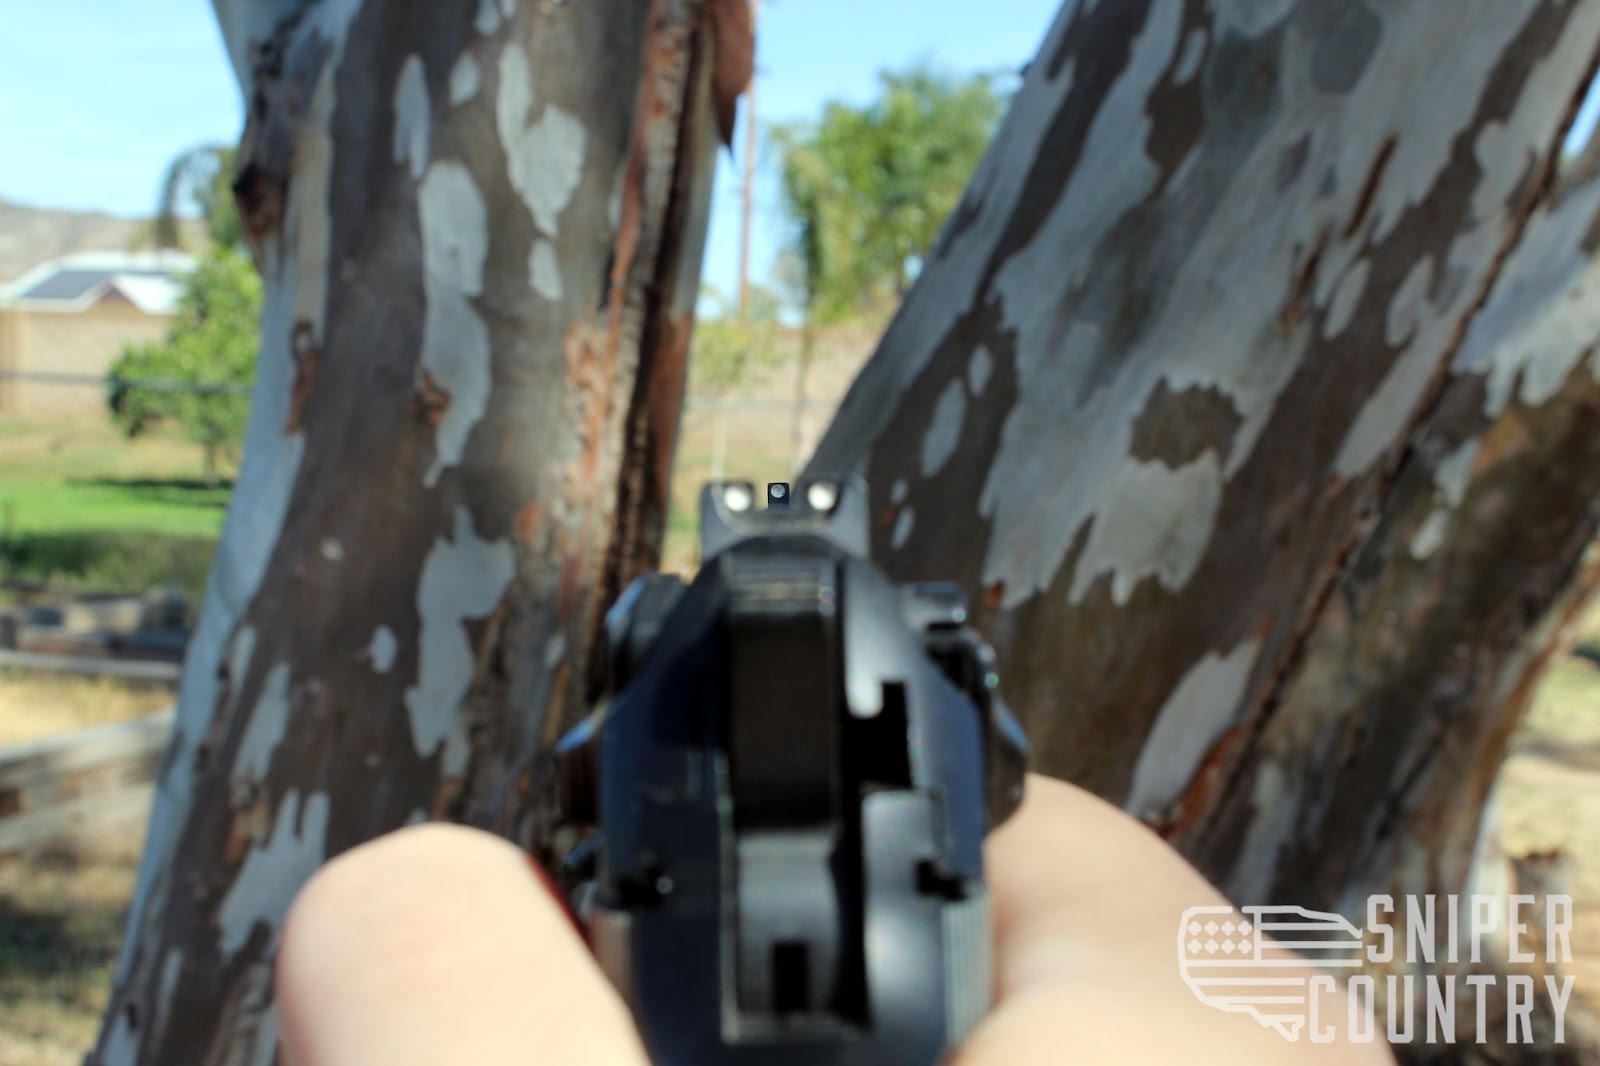
I have equal distance between the front post and the two rear notches, I have all three lined up at equal height, and they are fairly level. You should be impressed I got this picture, this wasn’t easy to do with manually focusing the lens, holding the gun, and taking the picture!
A good grip, focusing on the front sight, and equal height/light and you’re good to go.
Put the front sight on the target and squeeze the trigger.
The number one way you’re going to mess up your shot is by pulling the trigger. This is why lower weight triggers are so much better for accuracy.
You want a consistent, smooth trigger pull. This takes a lot of practice, I strongly recommend dry fire for this.
Don’t yank the trigger, don’t twist your hand while you pull, just a nice smooth squeeze is all you need.
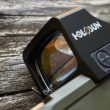
Red Dot Sight
Trigger pull fundamentals are the same, so remember that.
Everything else is different, but a lot easier.
With a dot on your gun your focus on the TARGET. This is better for a huge range of reasons like better situational awareness, better target control, better follow-up, but also it’s just more natural.
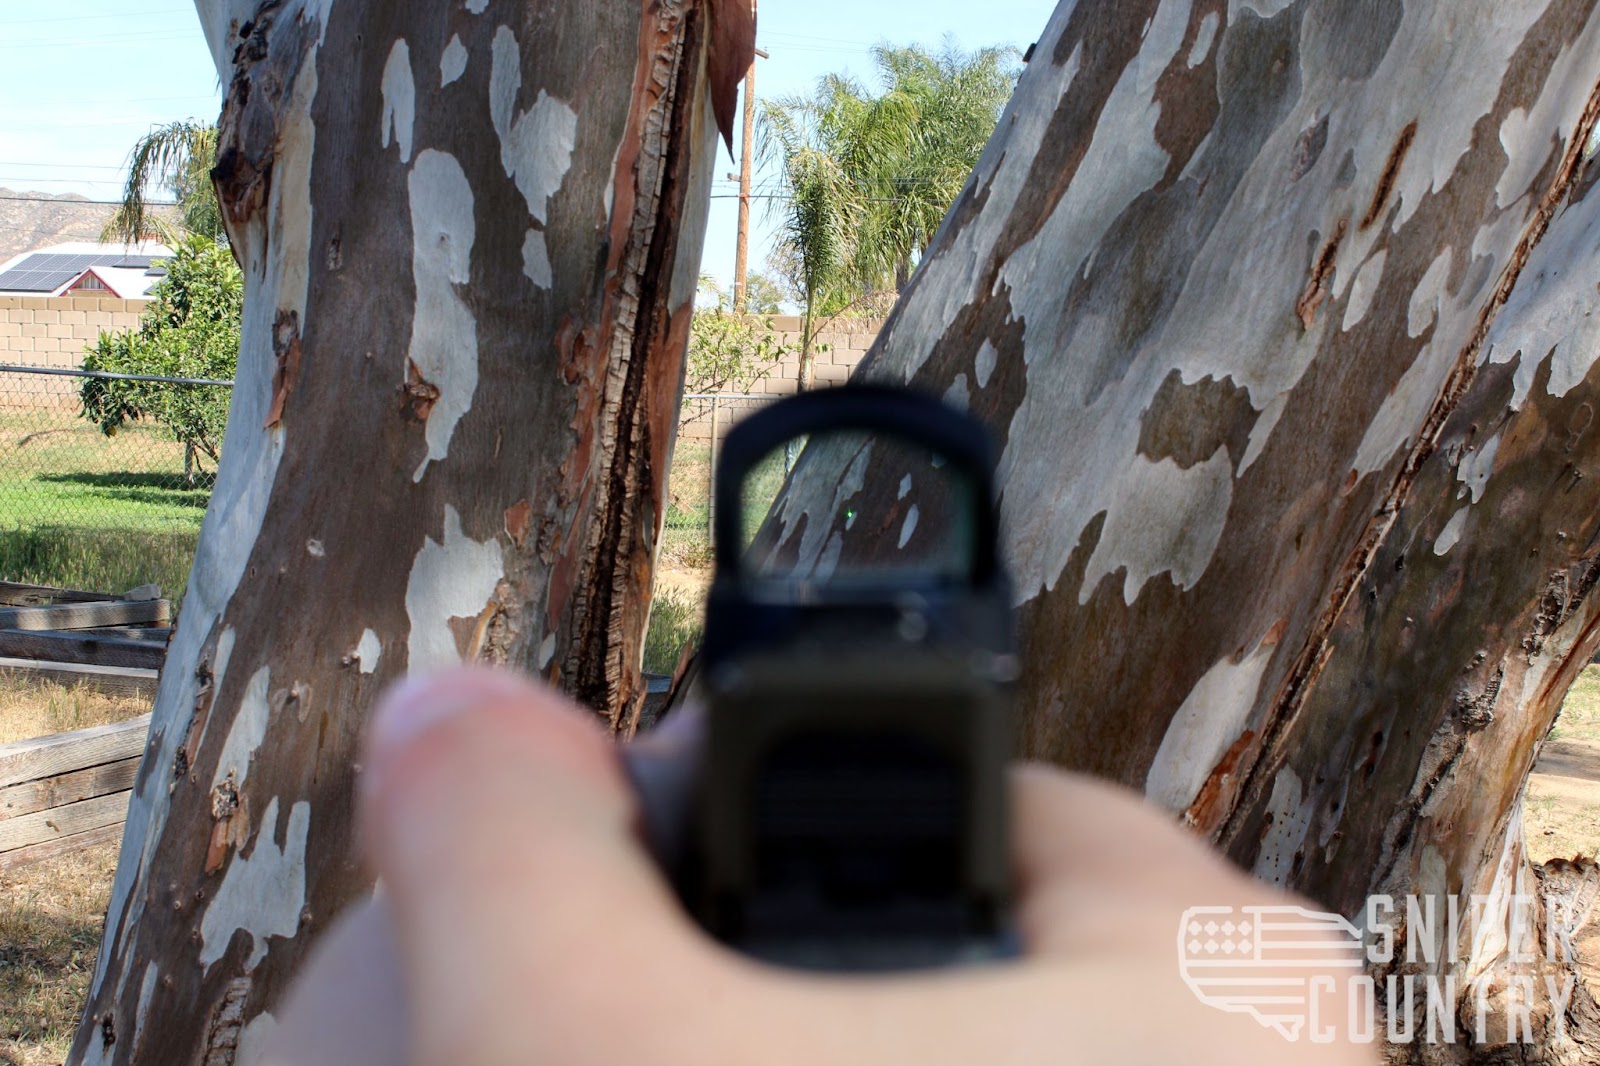
Note the small green dot in the middle of the optic window.
Look at what you’re shooting, simple as that.
Place the dot where you want to hit and then pull the trigger.
Yes, it is really that easy.
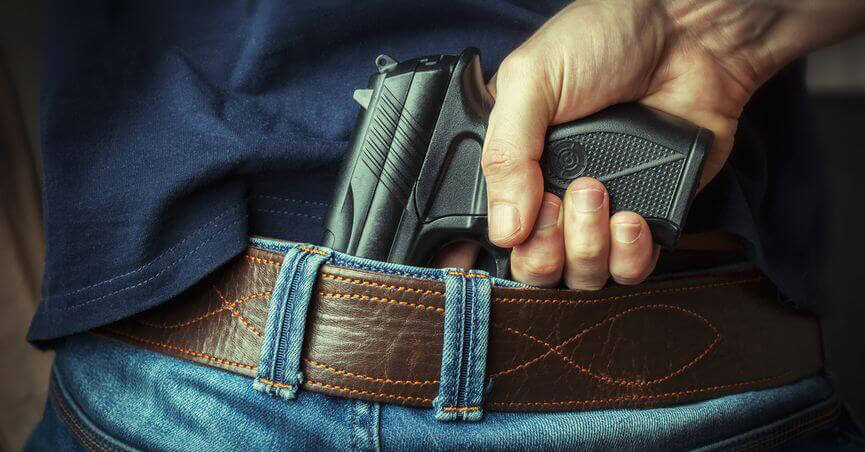
How To Draw A Pistol From A Holster
I’ll be real with you — my draws are not great. Drawing a firearm is a skill that takes a LOT of practice. While I can confidently draw and fire my CCW from most concealment levels, this is not something I am a master at.
I could write a million words on this topic but the best way to learn this is from an instructor, lacking that — a good video will go a long way.
I’ll still tell you the basics in my words, but I really recommend you take a look at the videos also.
Pistol Draw
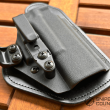
The first thing you need to do is CLEAR YOUR GARMENTS. Concealed means your gun is hidden in some way. Strong side, appendix, small of your back, no matter where or how you place your gun there is going to be something in the way.
Clear whatever is in the way first. Normally using your weak side hand if possible, grab your shirt/sweater/hoodie/parka and move it. Hold it there, then use your strong hand to draw.
Getting a full grip on the gun before you move it is critical. Don’t finger pinch it, get a solid master grip on it before it ever leaves the holster.
If you can’t do that, you need to adjust how you carry. Maybe a new holster, maybe a new gun, maybe just a new way of carrying.
We have a boatload of holster articles so take a look! Quick and easy, the Best Concealed Carry Holsters!
Once you have that solid master grip, pull up to clear the holster, then press out to present the gun.
After you’re fully in position, aim, and fire.
Open carry is the exact same, except you don’t need to clear a garment first.
All of this goes for no matter how you carry, but there are some nuances depending on how you carry.
I carry on my strong side just in front of my hip. For everything else, take a look at some of these videos!
Recommended Videos
Wrapping Up
That was a LOT of ground we covered but I hope it helped! From cleaning your first gun to getting out on the range and training some fundamentals, this should give you a firm basic understanding of gun operations.