
In this Article:
Why Reload?
While reloading for your guns is usually thought of as a cost-savings for those of us who shoot a lot, there are other advantages involved. The common assumption is that you save money by reloading-and that is true, to a point. If you are a volume shooter or a competitive shooter, saving money is one benefit of making your own ammo. My unscientific estimate is that I can shoot roughly four to five times the amount of my reloaded ammo than I could shoot factory ammo for the same cost. (I cast my own bullets which keeps my costs down. If you buy factory bullets, the cost will go up a little). For most of us “average” (not competitive or volume) shooters who reload, we do it as a means of saving some money, but reloading has also become a spin-off hobby from shooting. I can’t tell you how many hours I’ve spent at my reloading bench, relaxing after a busy day. I use it almost as a form of therapy. I’m sure I’m not alone in that regard. Plus, it gives me a feeling of accomplishment when I bring home venison or small game that I harvested with my reloaded ammo. The ability to custom-tailor loads for your specific guns and purposes makes reloading a hobby worth looking into.
First: Some Do’s and Don’ts
Reloading demands attention to detail and requires some knowledge of laws. What can you do with the ammo you manufacture in your garage or shop? Well, let’s see what we can’t do with it first. We can’t sell it unless we have set ourselves up as an “ammunition manufacturer.” In order to do so, you must obtain one of the two following “manufacturers” types of FFL licenses. Here are the two types of FFL licenses that deal with ammunition, from the BATF website:
Manufacturers:
 06 – Manufacturer of Ammunition for Firearms Other Than Ammunition for Destructive Devices or Armor Piercing Ammunition.
- 10 – Manufacturer of destructive devices, ammunition for destructive devices or armor piercing ammunition.”
So, if you intend to sell what you reload, you need to obtain the proper license. Unless you are setting up a company to mass-produce ammo, it may not be worth the hassle of obtaining a federal license just to be able to sell a few hundred rounds you make in your garage. Here’s something else to consider. Letting your buddy shoot your ammo may not take into account the simple aggravation experienced by him or her if your rounds won’t chamber or get stuck in the chamber. I’ve been there and, at the least, it’s embarrassing if not dangerous. There’s potentially nothing legally wrong here, it’s just a pain to deal with. You can give it away to your shooting buddies without the need for a license but you need to be aware of the fact that you are liable for anything that might happen to the shooter or their gun as a result of a malfunction of your loaded ammo.
Shoot The Ammo You Make Yourself
So, in my experience after reloading for over forty years, shoot your ammo in your guns and if somebody wants to try a load you made, be with them when they do and limit shooting to a few test rounds. If they like your ammo, you can always invite them over and let them use your equipment to load some rounds themselves. This is also a good way to recruit new shooters into the reloading fraternity. I mention these points up front as a sort of disclaimer…instances of actual occurrences of problems are rare. Overall, reloading is a safe, fun hobby…we want to keep it that way.
For the vast majority of us who reload, we don’t want to go into the ammo business so we don’t need an FFL license. All we need is equipment, supplies and time. As shooters and reloaders we need to be in compliance with all laws, so you also want to investigate whether you are able to reload at your residence legally. Check with your local law enforcement buddies to make double-sure it’s OK. I live in a rural area in a gun-friendly state so I have no problem loading for my guns in my garage legally and testing loads at my back yard range.
Love Ammo? Get My Cartridge Comparison Handbook!
Get my premium 550+ pages handbook that compares all cartridges, for free (worth $199!) only today !
Your e-mail address:
This e-mail address seems incorrect...
Success! Check your mailbox.
This e-mail address is already subscribed.
Loading ...

The Basic Reloading Process
Here is the basic process for reloading single-projectile cartridges for rifles or handguns (not shot shells of any type). Remember that these are very basic steps – other steps may be required, but we’ll list any differences later. A more-detailed reloading process is explained in Part Two of this article.
1. Sort your fired brass. There are several options here…at the very least make sure all the brass is the same caliber.
2. Clean your brass in a tumbler. This will make the brass ready to inspect.
3. Inspect the cleaned cases for cracks or other deformities; discard any with imperfections
4. (Rifle) Check case length to make sure it’s within specifications.
5. Place the shell holder in your press and insert an empty case.
6. Resize the case in a press using the resizing/decapping die.
7. Remove the spent primer (usually done as part of the resizing step).
8. Clean the primer pocket if necessary. (This may be needed for some precision rifle reloads). I remove powder residue from handgun cases that have been fired many times by using a brush on a Dremel tool.
9. Re-seat a new primer. Use either a press-mounted primer seater or handheld or portable bench-mounted priming tool.
10. Bell (or flare) the case mouth to accept the new bullet using the second die for handgun loads.
11. Drop the measured (metered) powder charge into the prepared case.
12. Seat the new bullet and crimp if necessary using the third (seating) and fourth (crimping) dies for handgun loads. Most rifle die sets only have two dies, resizing/decapping and bullet seating.
13. Inspect the finished rounds for protruding primers or other abnormalities. Discard or re-work cases that are not true to specifications.
14. Store your reloads in proper containers and label the box. Keep good records of what works and what doesn’t.

This is the bare-bones process for turning empty cases into ready-to-fire rounds. There are some variations in the process depending on whether you are loading for rifle or handgun but we’ll get to those later in Part Two.
What Do I Need To Get Started?
Now let’s look at the specific equipment needed to get your reloading hobby up and running.
A Good, Stout Bench
A reloading bench made of wood is easily built in most cases. I used 2x4s for the frame and top for mine. Make sure it is high enough – I’ve been at some benches that were too low and by the time you work the press handle 500 times, your back is killing you. Another requirement is that it be sturdy and not flex when trying to resize stubborn cases. Some benches I’ve seen are fancy, with laminate-covered tops and drawers below…build or buy whatever works for you. Just don’t forget you’re going to need plenty of storage around the bench for supplies and loaded ammo. Please remember to store your powder safely away from other components. A fireproof powder safe or cabinet is best.
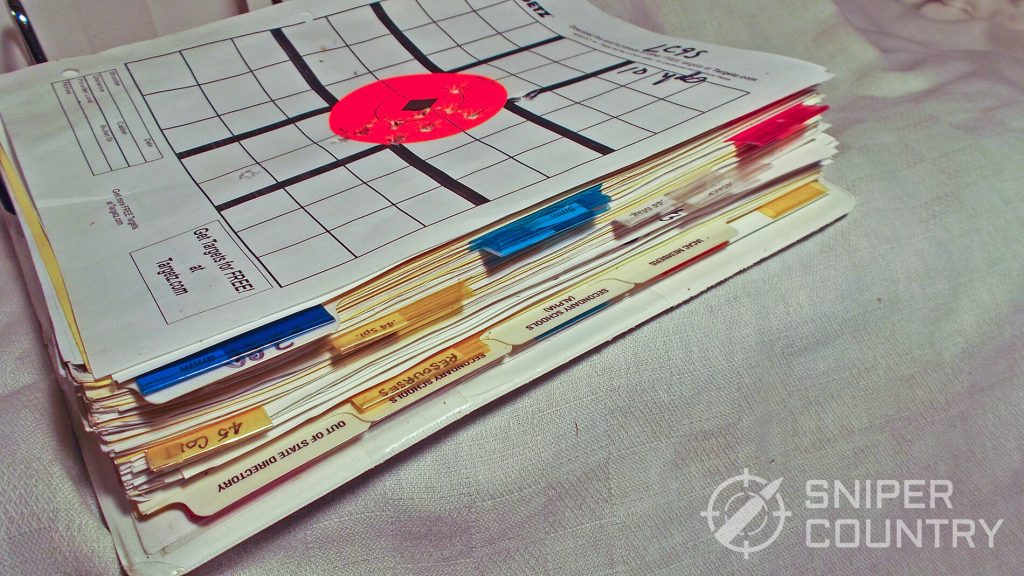
One Or More Reloading Manuals
You should not begin to reload without one or more reloading manuals. All major bullet manufacturers put out manuals. Other great manuals to have are those offered by the Lyman and Lee reloading equipment companies. A printed manual is best, but if you must get information online, only use load data from bullet, powder or reloading equipment manufacturers’ websites. One advantage of doing this is that the manufacturers continually update load data so you will get the latest information possible. Remember these companies have proper test equipment – we don’t. Therefore, their data is sound and based on science coupled with years of expertise. On the other hand, the loads posted on someone’s reloading website may or may not be over-pressure for your gun. So use caution when going online for load data. And, no matter where you get load data, ALWAYS start at the listed minimum load. If there is no separate minimum-maximum range given, drop the one listed load 10% and work up from there. Be careful and don’t ever start at the maximum level. This safety precaution needs to built into any reloader’s protocol.
Love Ammo? Get My Cartridge Comparison Handbook!
Get my premium 550+ pages handbook that compares all cartridges, for free (worth $199!) only today !
Your e-mail address:
This e-mail address seems incorrect...
Success! Check your mailbox.
This e-mail address is already subscribed.
Loading ...
Reloading Press
If you want to reload at the range in order to test loads, there are hand-held tools you can use to do that. But, for our purposes we shall look at bench-mounted presses that are meant to be in a permanent location. There are two basic types: single-stage and turret/progressive.
Single-Stage Press
A single-stage press does exactly what its name implies…it performs one operation on the case at a time. You screw one die in at the top of the press and run many cases, one at a time, up into it to perform that die’s function then remove the first die and screw in die #2, etc. You do one process many times before changing dies. These presses are the least-complicated ones to set up and use, but they are an important piece of equipment to have on your bench. I have an older RCBS Jr. single-stage press that I use for sizing bullets and for reloading calibers that I don’t have turret press die plates for. I also use mine for rifle reloading. Rifle reloaders tend to use a beefy single-stage press to full-length-resize long rifle cases. The closed, “O”-type single-stage press is the only type of press that I’ve seen that will resize a .50 BMG case without flexing. The leverage needed is great, more than can be provided by most turret or progressive presses. Every reloading bench needs a single-stage press. Another thought – beginning reloaders would do well to start out on a single-stage press until they are more experienced, and only then add a turret or progressive press to their bench.
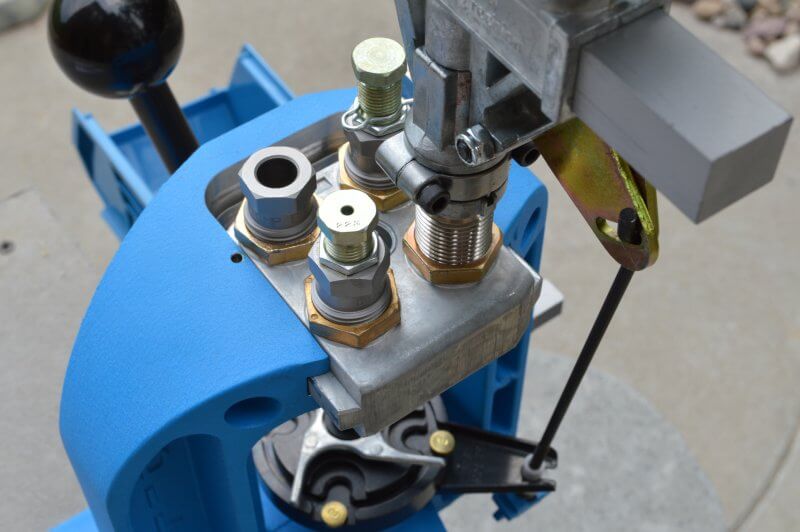
Turret Press
The turret press is probably the best-selling type of press. With a press-mounted powder measure and priming arm, production is speeded up. I have a Lee turret press and have cranked out two hundred or so rounds per hour. It is a straightforward process once everything’s set up properly.
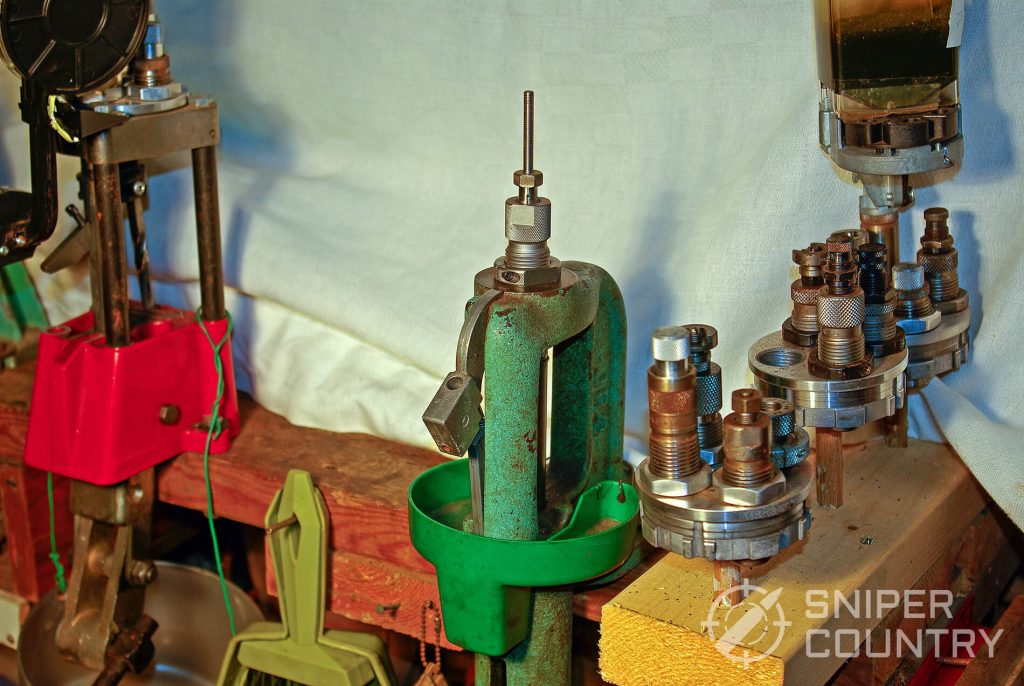
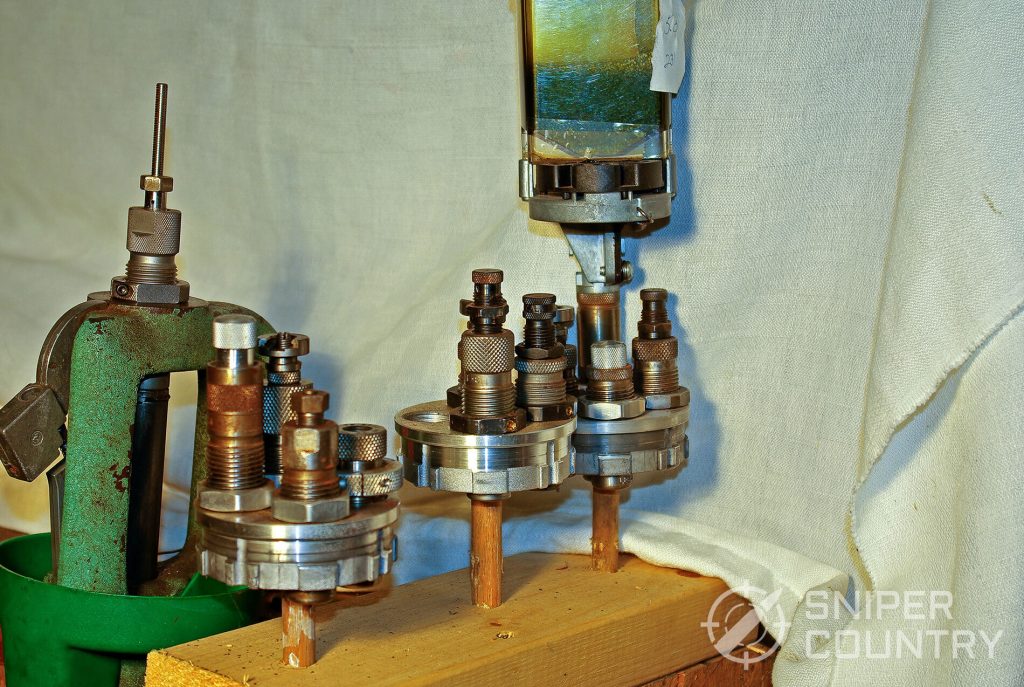
One advantage the turret press has is that you are able to buy separate empty die plates and load them with all the dies needed for one caliber. (A powder measure may also be mounted – see below). This saves a lot of time, in my experience. You simply pull the plate/die set from the press and insert a new one to change calibers. Here are some of mine:
Progressive Press
The true progressive press differs from the turret press in that the part that rotates is not a die plate but the shell holder plate itself. Instead of having one shell holder mounted on a ram like the turret and single-stage presses, there are several shell holder locations at the bottom of the press. This is the part that rotates – the dies are stationary at the top of the press.
The Progressive Press – Production Up To Speed
The progressive press can, when outfitted with accessories available for it, crank out hundreds of rounds per hour. Most every process is automated (depending upon the model of the press), so once the shell holder plate is full of cases, each handle pull will produce a finished round. High-volume competitive shooters or shooting clubs tend to use progressive presses as they produce a lot of ammo in a short period of time.
However…
The downside is that progressive presses tend to be more expensive and complicated to set up and operate. Also, instead of keeping different quick-change turret plates loaded with dies for other calibers (as is used with turret presses), once a progressive press is set up for a single caliber it tends to stay that way. Most reloaders using progressive presses who have the need to reload for more than one caliber simply buy another press in the new caliber. It’s not uncommon to see three or four progressive presses lined up on a volume-shooter’s reloading bench, all outfitted with powder measures and bullet/case feeders. For most of us who are not into competition or volume shooting, the turret or single-stage press will suffice.
The Progressive Press Process
- Place an empty cartridge case in the first shell holder station, run it up into the first die, pull it down and then put a second case in shell holder station #2. Pull the handle and case #1 goes up into the second die while case #2 goes into the first die. Pull the handle.
- Case #1 goes into the third die and case #2 goes into the second die; load another empty case into the shell holder plate. Pull the handle.
It sounds confusing but once going, it’s not. The object is to load the shell plate fully and make a completed cartridge with every pull of the handle as each case advances to the next station with every pull of the handle.
The advantage of this type of press is that with the right accessories mounted (such as powder measures, priming arm and case and bullet feeders), you produce a loaded round with each handle stroke once you have the shell holder plate fully loaded. This is great for volume shooters or clubs. Most progressive presses will put out 400 – 500 rounds per hour, once set up and going.
Powder Scale
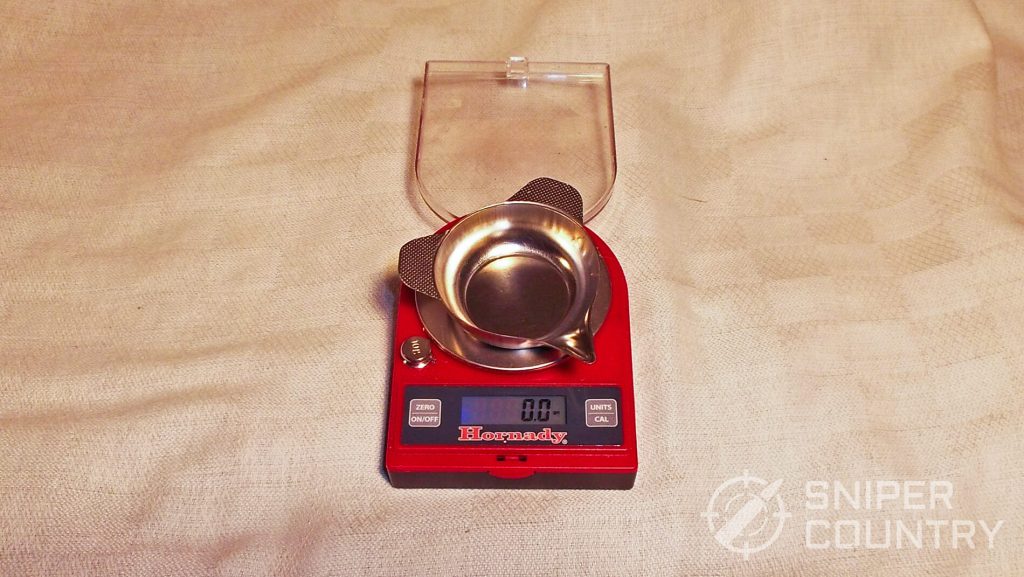
The powder scale, next to the press itself, is the most important piece of equipment you need. This device weighs powder charges. Two basic types are digital and balance beam scales.
The digital scale is gaining in popularity now that prices are coming down. It consists of a base with the scale/digital display and a powder pan. These scales are very accurate and easy to use. First, place the empty powder pan on the scale and turn it on. Hold the “zero” button down until zeros appear in the LCD display. Then put your powder charge (either from a powder meter or by dipping) into the pan and check the numbers. It tells you quickly whether you’re high, low or right on. I use mine to weigh powder charges as I set my bench-mounted powder measure to throw a certain weight of powder or drop powder from a dipper. I also use it to weigh individual rifle powder charges.
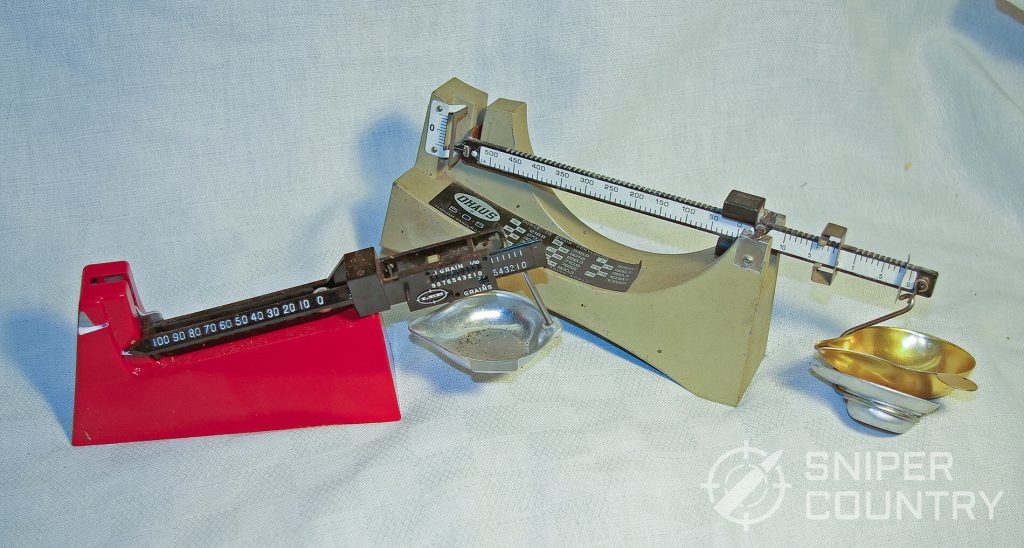
Balance beam scales are mechanical and work by balancing the powder charge in the pan against a sliding counterpoise on the other end of the marked beam. This scale can measure weights in tenths of a grain, single grains, tens of grains and hundreds of grains. I have two of them: an old RCBS 5-0-5 scale bought in the 1970s and a newer Lee scale purchased a year or so ago. They both do the same thing – they just do it differently. The magnetically-dampened beam pointer will oscillate up and down as it settles; the goal is to get it to stop in the middle at the zero mark. Once balanced, the pan then contains the amount of powder indicated on the beam’s scale at other end of the balance beam. This is the old-fashioned way to weigh powder but it works.
Powder Measure
The next piece of equipment you need is a powder measure. This device, once it’s set to the weight of powder determined by your powder scale, will dispense powder into the case. There are two basic types of measures: bench-mounted and press-mounted. Both have their advantages.
Bench-Mounted Powder Measure
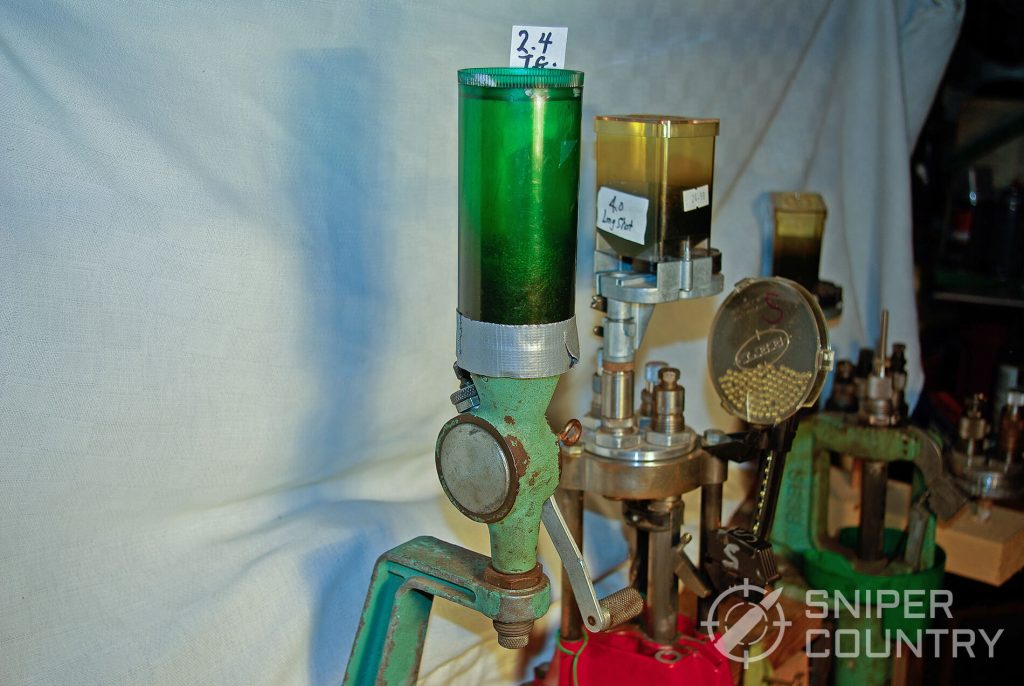
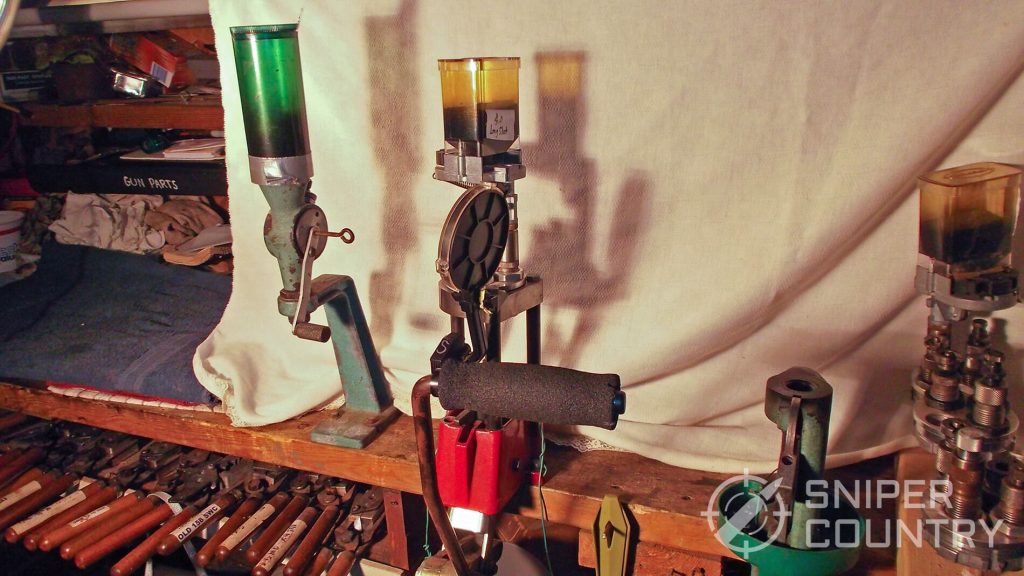
This type of measure works well with single-stage presses and is very versatile. If you are experimenting with different powders or powder charges, sometimes it’s easier to use a bench-mounted measure that is manually operated (as most of them are). The measure has a threaded, calibrated rod that you back in and out of the powder measuring chamber to increase or decrease the amount of powder being dropped. It measures volume, not weight. Back it out, more powder fills the chamber and gets dropped. Screw it in further, less powder goes out. It’s a simple process but can be very accurate. Powder is stored in a hopper above the chamber. Changing powders is easy, as you just back the rod out all the way and operate the handle several times to empty it out. Newer measures may have removable powder hoppers so you can keep two or three hoppers loaded with different powders for quick-change operations. Most beginners will start with a bench-mounted measure.
Press-Mounted Powder Measure
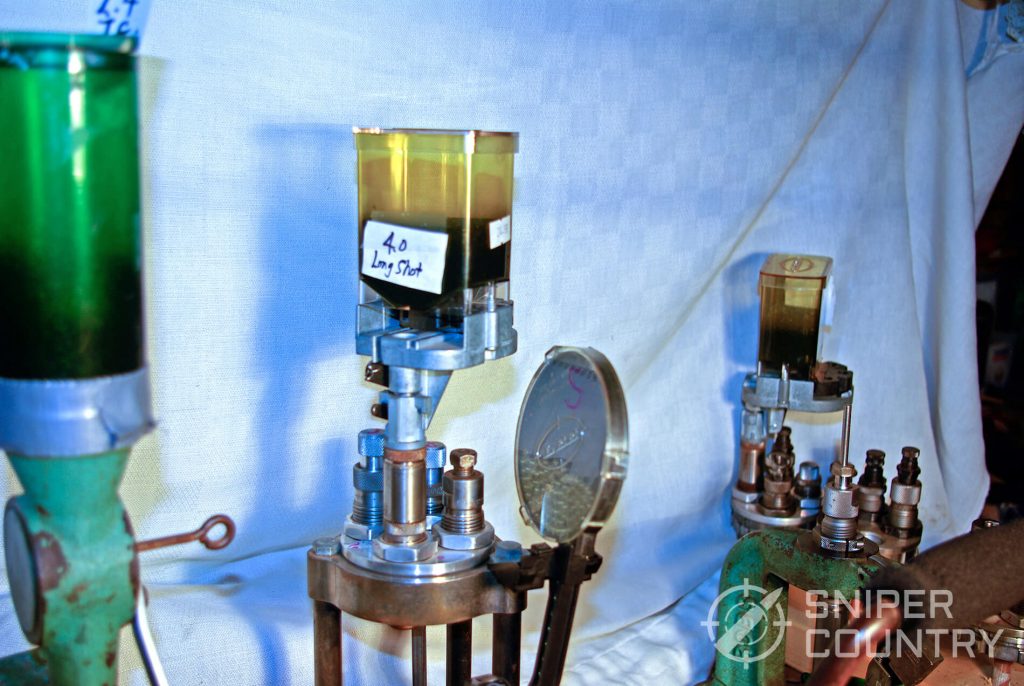
These types of measures are usually mounted on a specialized, hollow handgun case expanding die. When the case is pushed up into the die to bell the mouth, a mechanism pushes an activator in the powder measure, dropping powder into the flared case.
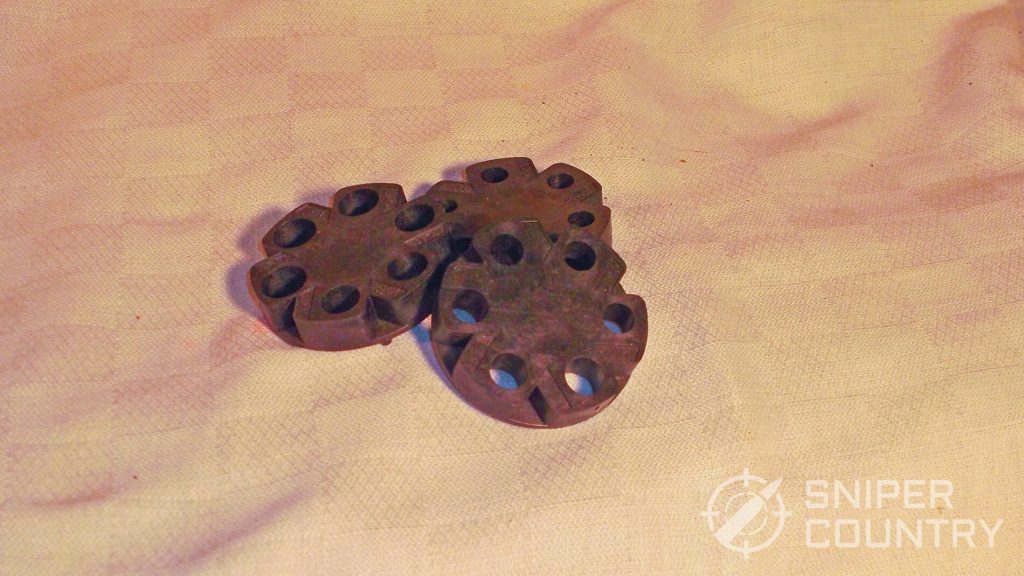
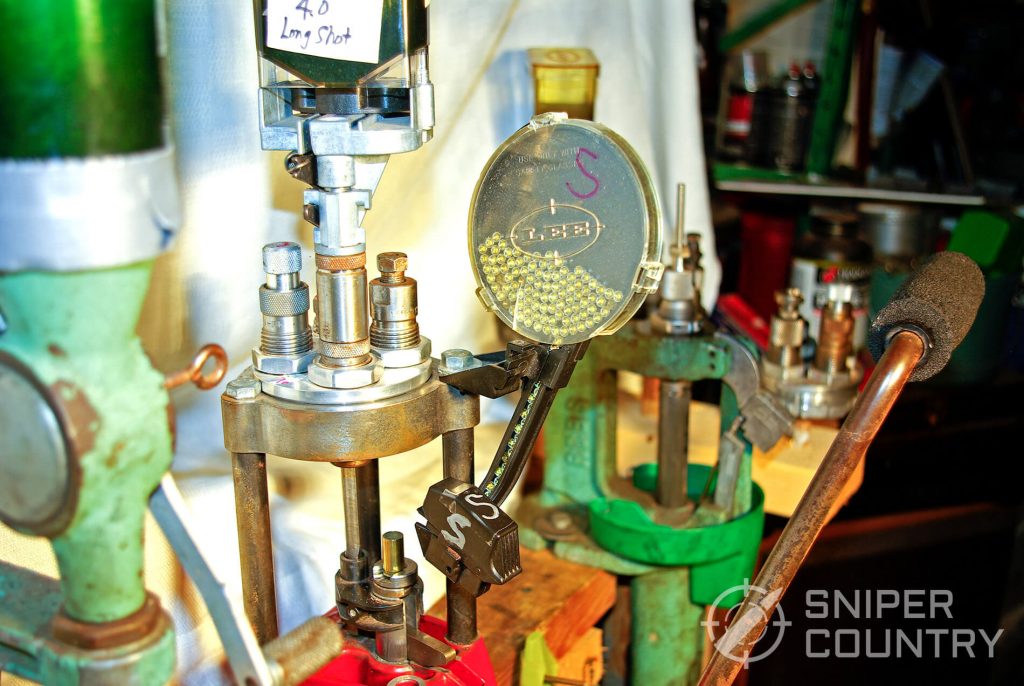
These measures tend to throw charge weights that are very repeatable, as most of them utilize some sort of multi-holed disk that takes the place of the powder cavity in the bench-mounted measure. You have the choice of selecting one of several cavities of varying sizes (volumes) in order to throw a predetermined charge. A glance at a the included powder correlation chart will help select the correct starting cavity. To increase or decrease the amount of powder thrown, you swap disks (or at least use another cavity in the same disk). Some measures use a threaded, calibrated rod like the bench-mounted measure in place of disks to change powder charge weights. I use a Lee Auto Disk measure that comes with a chart listing many powders, charge weights and corresponding disk cavities. Here is what the disks look like:
One advantage the press-mounted measure has over the bench-mounted variety is that you are able to buy multiple measures and leave them set up for different calibers. Once you’ve found a load that works well for a certain caliber, simply leave the measure attached to your expander die and don’t change anything. This greatly speeds up production.
Dies
All of the previously mentioned equipment listed is useless without reloading dies. What are dies? They are precision machined, threaded cylinders made of hardened steel that you push the case up into in order to perform the different processes that produce a loaded round. The dies screw into the top of a single-stage or progressive press, or are mounted on a turret press die plate. Let’s look at the three or four basic handgun dies.
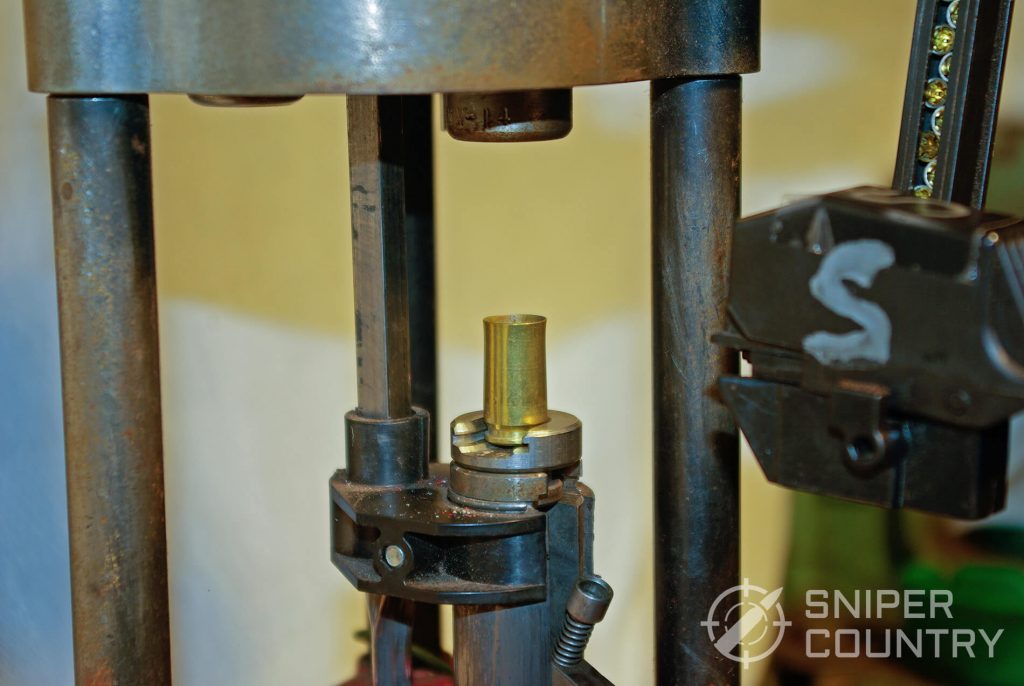
Resizing/Decapping Die
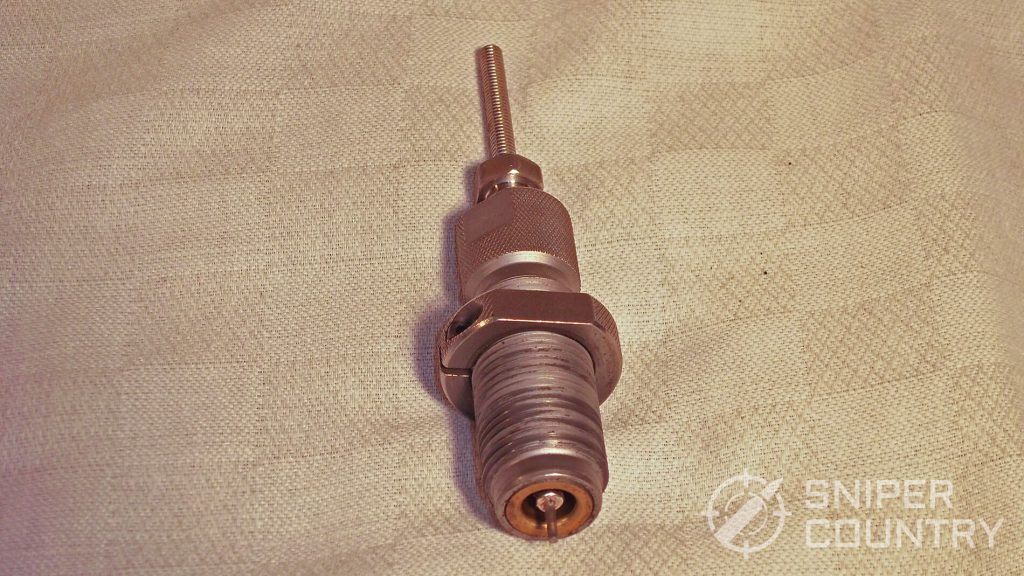
The resizing die is used first and usually performs two functions. The empty case is pushed into this die until the shell holder contacts the bottom of the die, as far as it can go. At this point, the case has been sized back down to factory dimensions to allow it to chamber freely. Most handgun resizing dies have a pin that pushes the spent primer out of the primer pocket so you accomplish two tasks at once (processes four and five from the list above).
A Time-Saver – The Carbide Sizing Die
Most handgun three-die sets include a sizing die with a very hard tungsten carbide ring installed that contacts the case. This ring allows you to size the case without lubrication. This greatly speeds up the process. After tumbling or otherwise cleaning the cases, running them through a carbide sizer/decapper die is a fast process as you do not have to lube, then clean, those cases. If your sizing die does not have the carbide insert, you must lubricate the cases before resizing. A lubrication pad and case lube are needed. Put a few drops of case lube on the pad. Roll several cases at once on the moistened lube pad and then run them through the resizing die. Don’t overdo the lube-a little goes a long way. After lubricating and resizing the cases, they then need to have the lube cleaned off either by hand or by tumbling. A carbide sizing die is worth having, however. The time saved by using the carbide die more than makes up for its cost.
Expanding Die
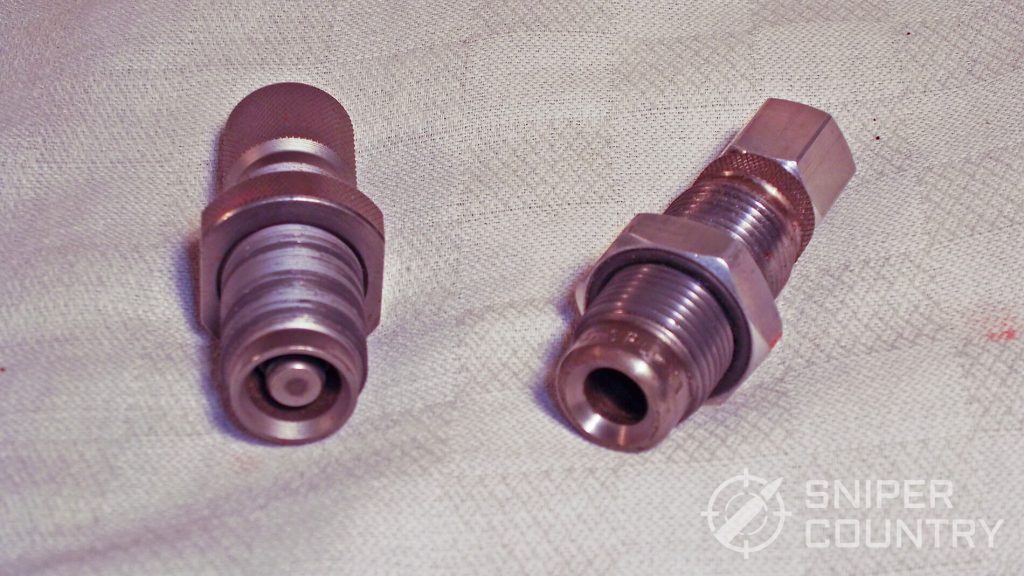
The expanding die bells, or flares, the handgun case mouth slightly to accept the new bullet. After expanding the case mouth, the next die(s) to be used are the ones that perform bullet seating and crimping. We earlier mentioned expander dies that allowed a powder measure to be fitted to them. The photo above shows both a regular expander die and a die with threads that allow a powder measure to be attached to it.
Bullet Seating/Crimping Dies
Handgun cases must be firmly crimped into (or onto) the bullet, as discussed above. Use of the die(s) that accomplish this depends if you are crimping revolver cartridges or semiauto rounds. For revolver cartridges, the third die in the set, the bullet seating die, is usually sufficient to apply a roll crimp to the case mouth once properly adjusted. No fourth crimp-specific die is needed. For semiauto cartridges, a fourth, separate die is desirable. This die, called the factory taper crimp die, applies a tapered crimp to the case thereby locking the bullet in place. Why a separate die? Usually, revolver bullets will have a crimp groove or cannelure in order to facilitate the case mouth being rolled into the groove. This locks the bullet in place. Remember that revolver cartridges headspace on the case rim, so whatever happens up front to the bullet in terms of crimp doesn’t really impede function. Semiauto cartridges headspace on the case mouth. This means that roll crimps are not acceptable; a taper crimp must be used that allows the case mouth to seat against the ledge in the barrel’s chamber. Therefore, a crimp that simply squeezes the case mouth around the bullet is desirable. Most semiauto pistol die sets include four dies; revolver sets include three, omitting the taper crimp die. There is more specific information below concerning crimp applications.
Other Necessary Equipment
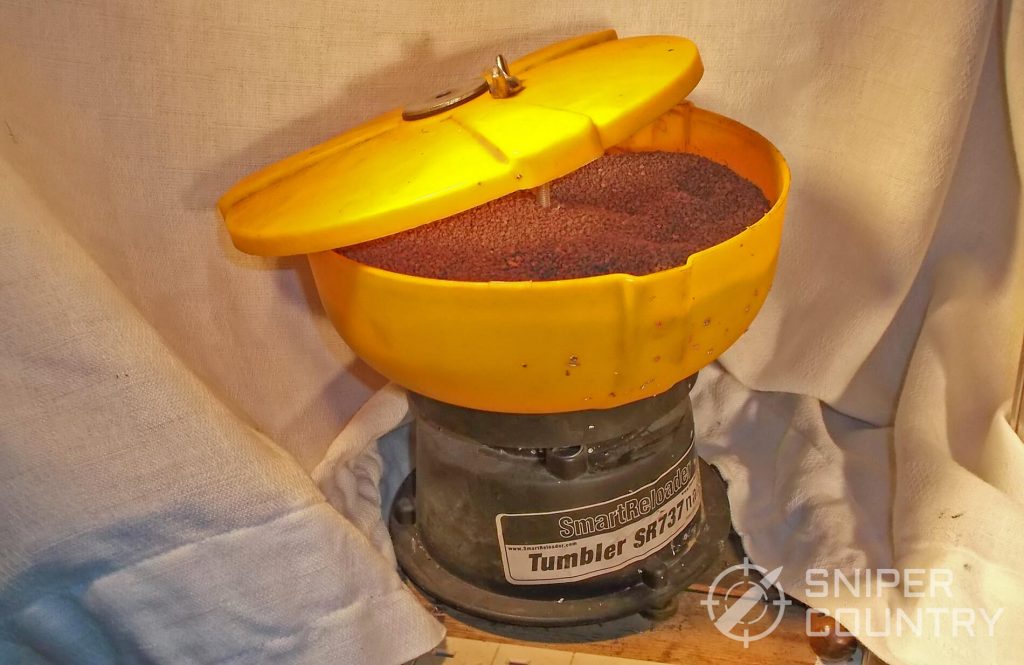
Tumbler
Clean, shiny brass is desired. Cases that gleam are easier to find on the ground, plus the tumbling process will remove dirt and powder smudges and leave the brass in like-new condition. Another reason to tumble your brass is to make it easier to inspect. Skip the cleaning step for new brass but don’t forget the inspection…even new cases can have problems such as imperfect primer pockets, case heads too thick or thin, or other abnormalities. Just because you bought one thousand shiny new cases doesn’t necessarily mean they are all perfect, although bad examples out of a new batch of new factory cases are rare. It pays to inspect them all.
Shell Holder
Shell holders allow the case to be inserted into the press. Lee die sets come with the proper shell holder; most other brands do not and the shell holder must be purchased separately. In either case, you need one for each caliber you reload.
Bullet Puller
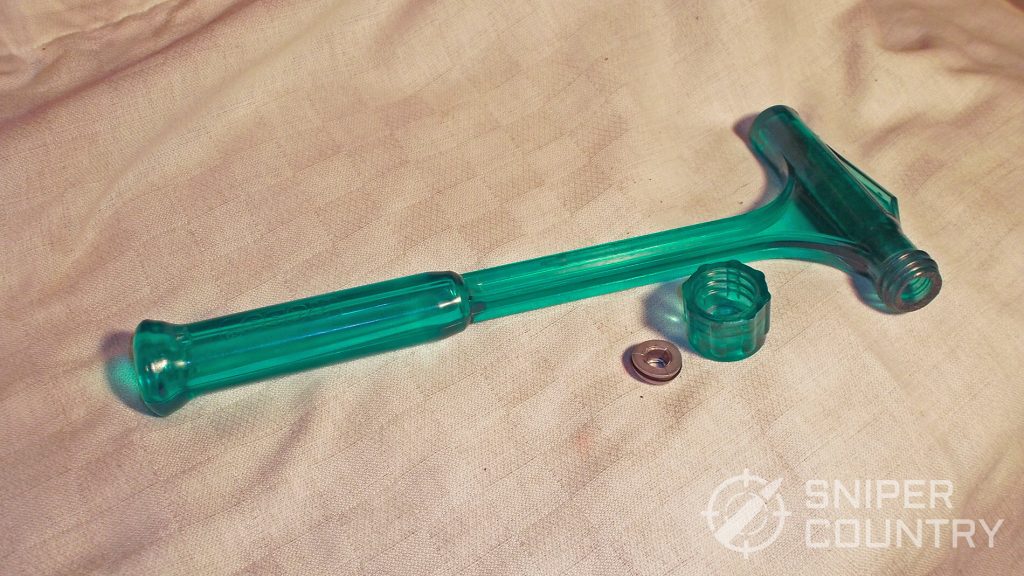
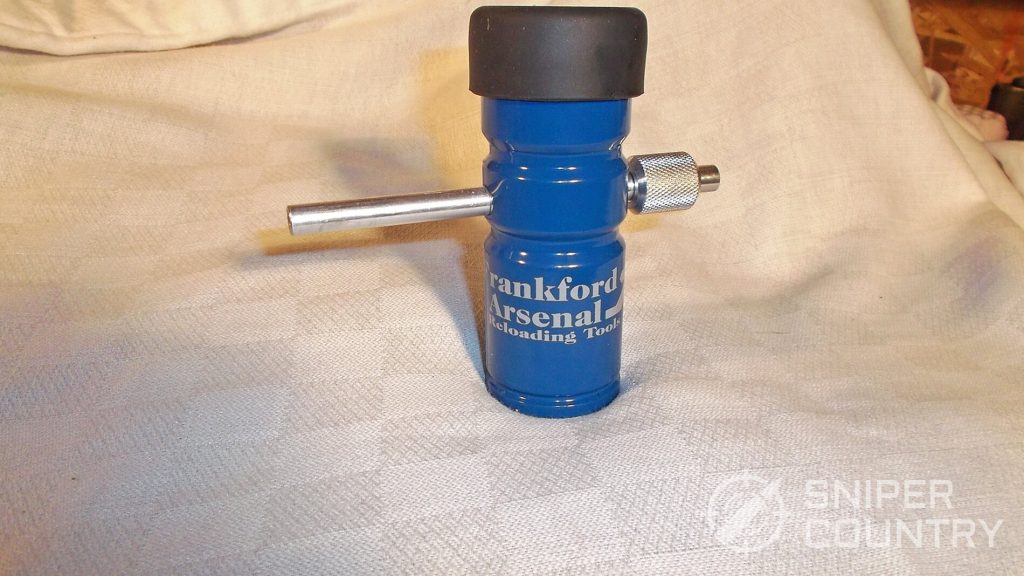
Not every round you load will be perfect. You may discover that the wrong type of powder was used – better to do so in your shop than at the range. The bullet puller allows you to remove the bullet and powder from a loaded case and possibly salvage those items. There are two main types of pullers: screw-in dies for your press with collet fingers to grab and hold the bullet while you pull the case away from it, and the inertial puller that looks like a plastic hammer. You mount the case in the mouth of the puller where it is held by the rim then whack it against a bench or other hard surface. Inertia pulls the bullet and powder free after a few hits. The number of hits required depends on how well you did at the crimping station. I’ve had an old RCBS puller for years and it still works well but there are many variations on this theme ut there.
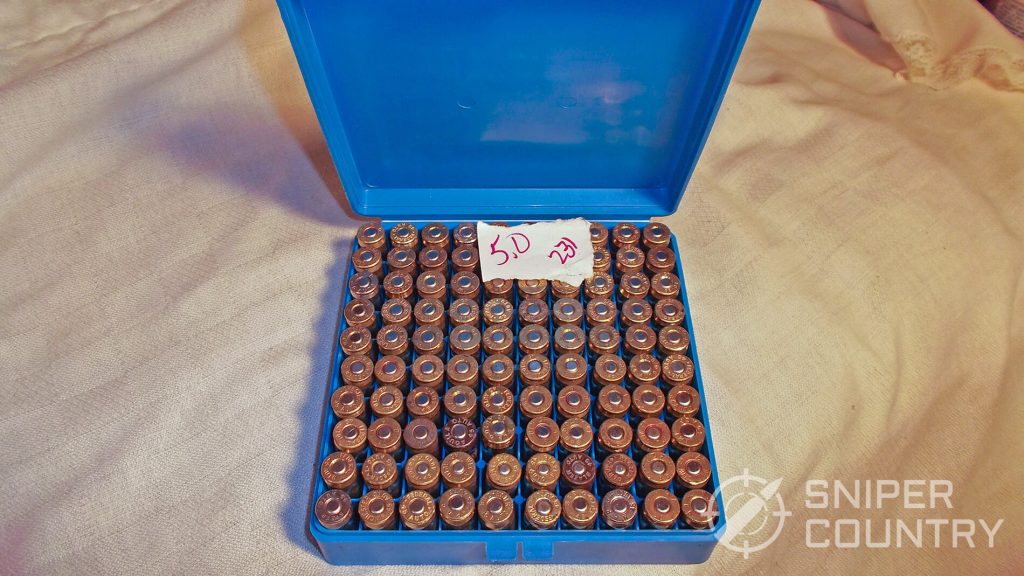
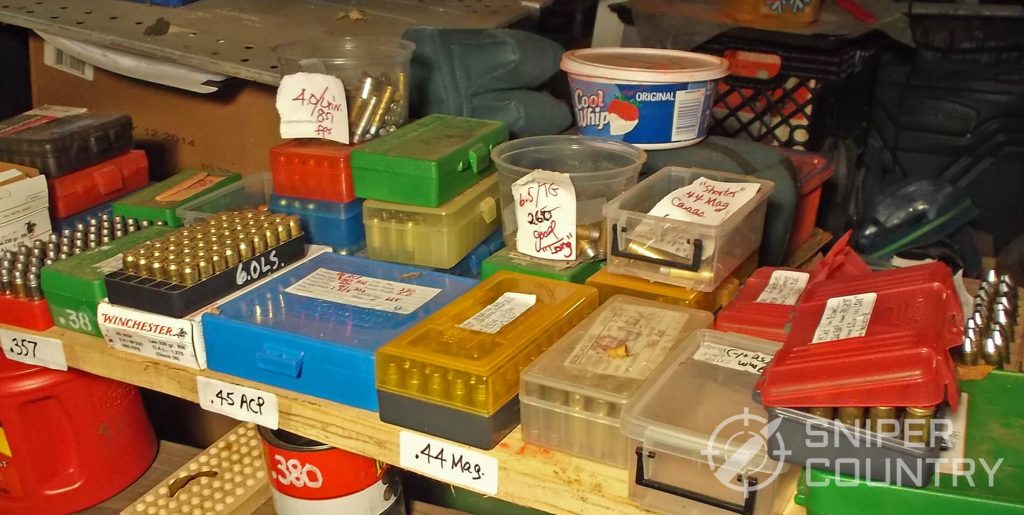
Loaded Ammo Storage Boxes
You must keep your reloaded ammo organized and sorted. Just sorting by caliber isn’t enough – you may load several different bullets or powder charge weights in a given caliber. Keep the ammo in a tight-fitting lidded container made for such purposes and keep it organized.
OK…we’ve looked at equipment needed to reload. Now, here’s how we use that equipment…
How To Reload, Part Two: The Reloading Process In Detail
We briefly looked at the bare-bones reloading process at the beginning of this article…now it’s time to look at it in more detail. Let’s look at a sample reloading process for handguns. We will finish by looking at some rifle-specific guidelines.
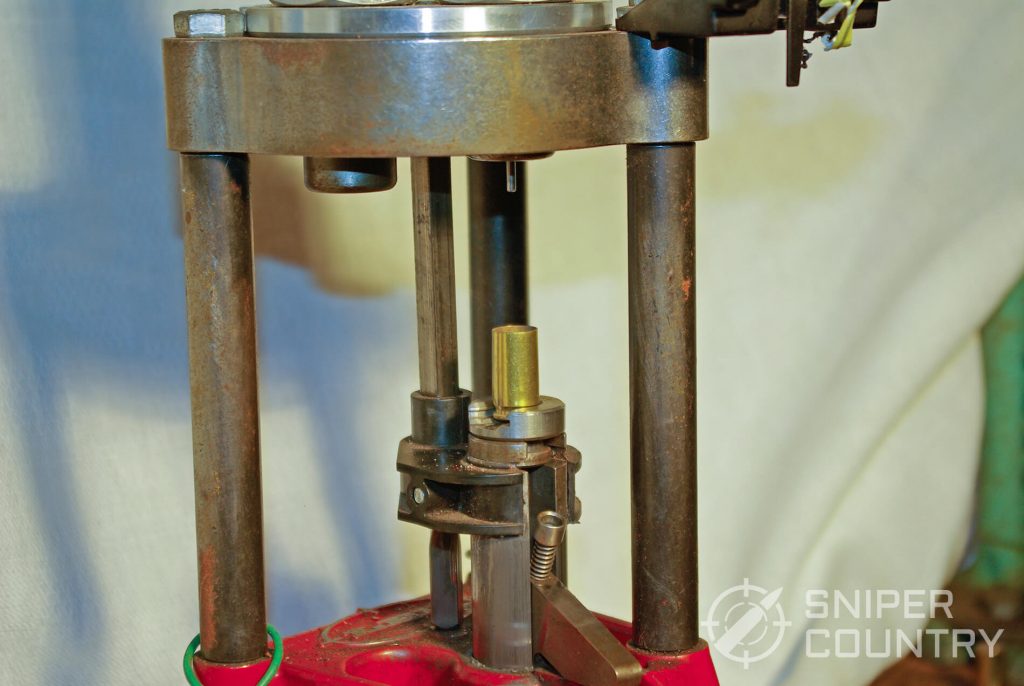
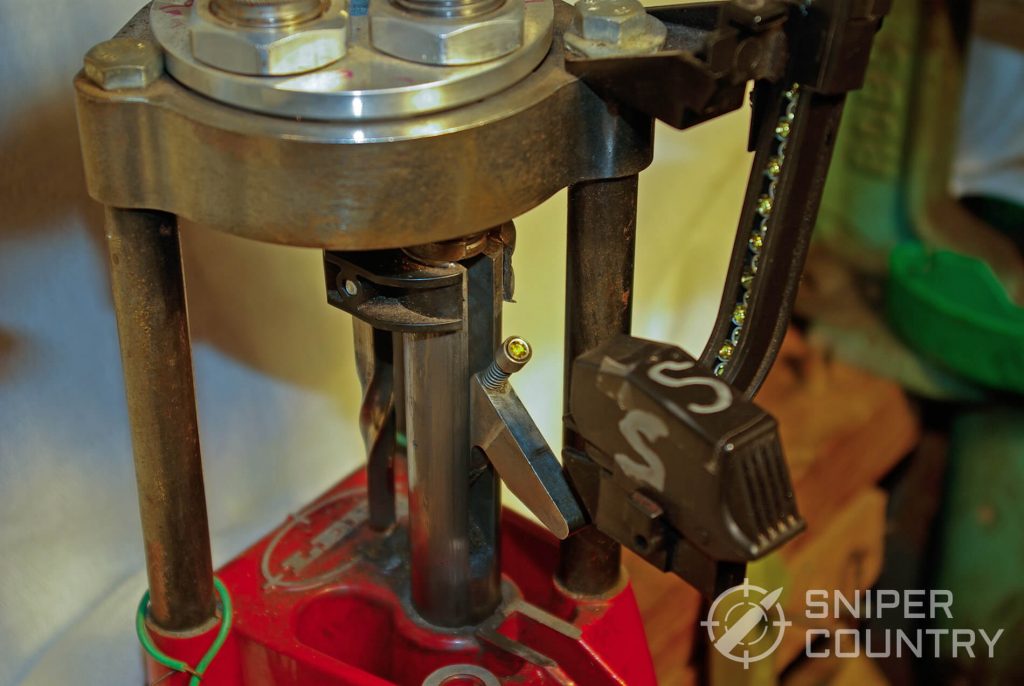
We’ll use a turret press in our example, as it is a very popular type of press often used for handgun loads. Some rifle calibers can be reloaded on a turret press – it depends upon their case length and force needed to resize the case. (If rifle cases only require neck sizing and will fit in a turret press, then that press can be used for those as well. See step #5 below in Reloading For Rifles).
This type of press is usually a manually-operated machine that requires up to five manipulations of the press handle in order to produce a loaded round. It uses one shell holder. A plate with three to five threaded holes to accept standard reloading dies is attached to the top of the press. You screw the adjusted dies into the plate and you’re ready to go. This makes for quick changes…just drop a different caliber’s die-filled plate into the top of the press for each caliber and you’re good to go.
Resizing and Priming
To start off, put a fired case in the shell holder and perform the first operation (resizing and removal of the spent primer) by working the press handle. At this point a new primer (from a press-mounted primer tray and seater) is pressed into the empty case. (Priming note: some reloaders prefer to seat primers with a dedicated primer seating tool mounted on the bench or the hand-held variety; I’ve always had good results just using press-mounted primer seating).
Expanding The Case Mouth
The handgun case’s mouth must be expanded in order to accept the new bullet. After priming the case, the next step is to work the handle to move the next die into position or manually rotate the expander die over the case. Sometimes the rotation is automatic and happens when the press handle is activated – it depends upon the model of the press. Expansion occurs as the case is pushed up into that die. Do not over-bell (expand, or flare) the case mouth – just open it enough to accept the bullet easily. Too much flaring of the case mouth can work-harden the brass, causing it to split more easily. Once split, it must be discarded.
Powder Charging
Now to add some powder…we will use a powder measure. There are two basic types: “automatic” ones that attach to the press, or the bench-mounted variety. Each has its advantages. Please see the Powder Measure description above for details.
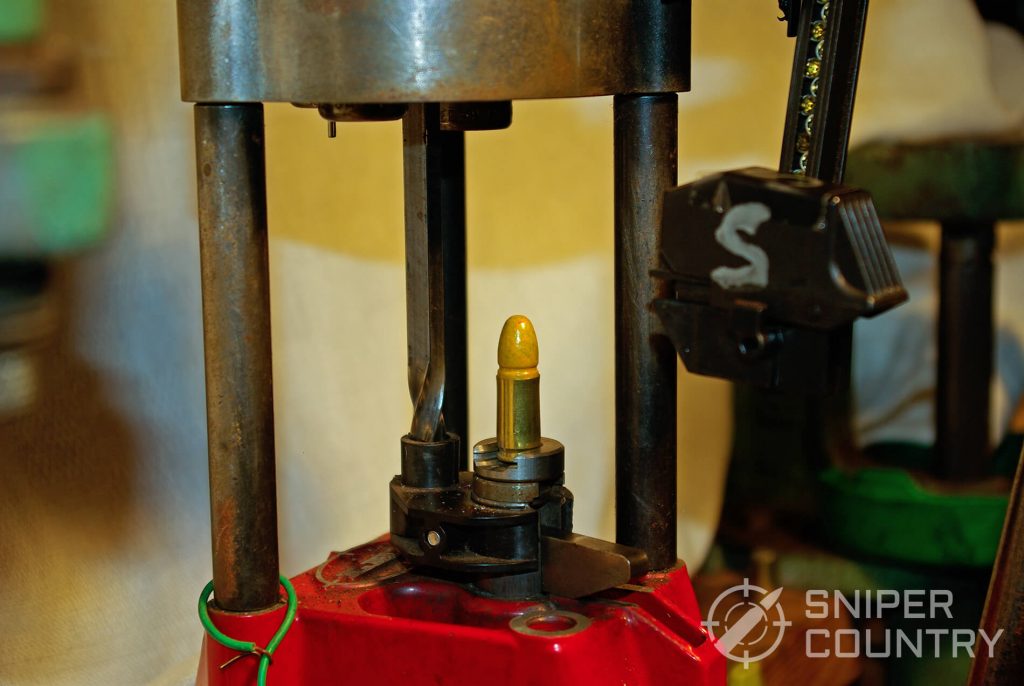
Bullet Seating
We’ve gotten to the point where it’s time to seat the bullet. Simply set a bullet in the case mouth and run the case up into the seating die. That’s all there is to it, assuming our die was adjusted properly.
Crimping
Handgun rounds need to be crimped. Crimping means to push the case mouth securely against or into the bullet in order to hold it in place. The proper completion of this operation is critical if you don’t want to have problems when shooting. There are two basic types of crimp: taper and roll. Reloaders need to understand the difference between the two types of crimp and how they relate to headspace.
Headspace and Crimp Types
Here’s a definition of headspace according to Wikipedia: In firearms, headspace is the distance measured from the part of the chamber that stops forward motion of the cartridge (the datum reference) to the face of the bolt. Used as a verb, headspace refers to the interference created between this part of the chamber and the feature of the cartridge that achieves the correct positioning. Different cartridges have their datum lines in different positions in relation to the cartridge. Some cases headspace on their case mouth (semiauto cartridges) and others on the case rim (in revolver cartridges). Either method works with the proper type of case as long as it causes the case to be held tightly in the chamber, against the bolt face. Proper headspace is important – if the cartridge is either allowed to enter the chamber more deeply than it should or not go in far enough, the gun will probably malfunction. Here is where the type of crimp applied matters. Taper crimp semiauto rounds as they headspace on the case mouth. Do not apply a roll crimp as you would with revolver rounds. This limits, to a degree, the type of bullets that may be loaded into semiautos. Generally, bullets with no crimp groove are preferred for semiauto guns since we’re not rolling a crimp into a groove. The case is taper-crimp-locked around the bullet.
Why not taper-crimp revolver cartridges as well? It goes back to headspace…revolver cartridge cases headspace against the case’s rim. The rim allows the case to go just so far into the cylinder’s chamber and then it presses against the back face of the cylinder chamber, holding it firmly in place. This impedes its forward motion and allows the case to be held tightly against the recoil plate so that when the firing pin hits the primer, the case doesn’t move forward but fires instead. Bullet selection is more open for revolvers since any bullet that allows the case mouth to be roll crimped against it will work.
Too Much, Or Not Enough, Crimp?
There is such a thing as too much crimp, especially in revolvers. Just apply enough to curl the case mouth slightly into the bullet. Too much and the case will bulge, preventing its entry into the cylinder. On the other hand, both taper and roll crimps can be under-done. Too little crimp may allow a revolver bullet to “jump its crimp” under recoil and allow the bullet to edge forward past the chamber mouth, binding the cylinder and preventing rotation.
The semi auto round can, when not crimped enough, do a couple of things. One thing that can happen if the crimp wasn’t applied properly is that the first round in the magazine fires but subsequent rounds’ bullets slam into the front of the magazine and get pushed into the case deeper. Each shot seats the lightly-crimped, succeeding bullets deeper. It only takes one deeper-seated bullet to raise pressures alarmingly. Another thing that could happen is that the bullet, seated in the chamber, is pulled free from its case by the extractor when you rack the slide. You end up with two potentially dangerous situations: a bullet stuck in the bore as it is held by the barrel’s rifling, and powder spilled everywhere inside the gun. Another round fired before you clear the barrel would be disastrous. So, crimping correctly is important.
So, there you have the basic process of loading handgun ammo with a turret press. It is important to remember that all of the processes of producing a loaded round are the same, no matter what type of press you are using. Pay attention to details and make sure whatever press, powder measure, scale, etc. you’re using is set up properly.
Now let’s look at reloading for rifles.
Reloading For Rifles
The process of reloading for rifles is similar to that of handguns, with a few important differences. Let’s look at the basic processes and differences between loading for rifles and loading for handguns. Unless you are loading straight-walled rifle cases (.45-70, etc.), the expander die is not needed and is not included in rifle die sets.
1. Tumble and inspect the cases for defects.
2. If necessary, trim the case to the specified length using a case trimmer and “true up” the case mouth with a chamfering tool. This will de-burr the case mouth and make the thickness of the brass even.
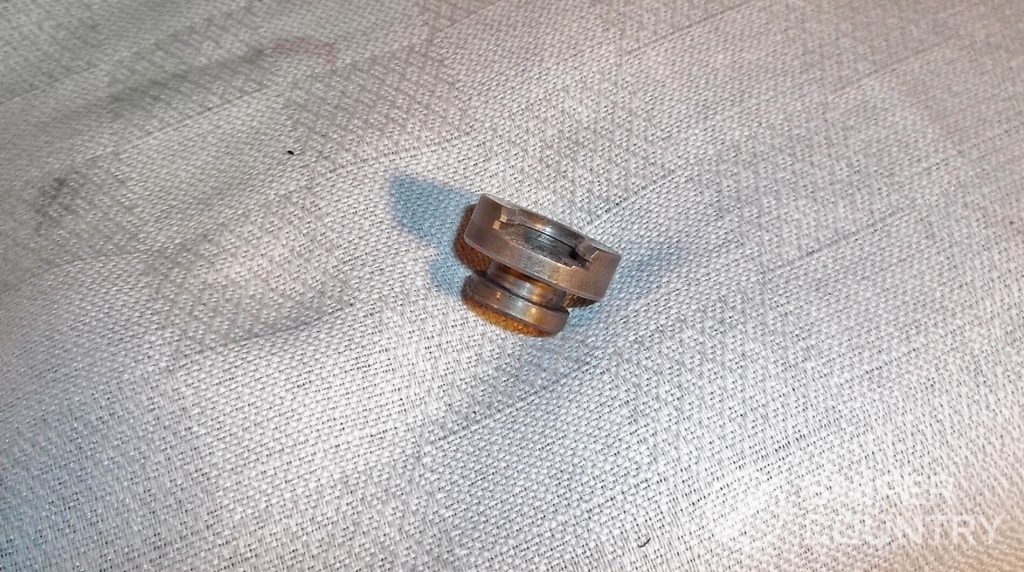
3. Inspect the primer pocket and clean it. I use a wire brush on a Dremel to clean the pocket and polish the case head. Unless you need to physically trim or true the primer pocket with a tool designed to do that, this is all the prep work needed that will allow a primer to be seated properly. If you are shooting surplus military brass, you may need to remove the primer crimp before trying to seat the new primer. The countersink in the above photo mounted on a drill makes quick work of that. Simply run it against the primer pocket for a few seconds. Use a countersink of the right size, not too big. The smaller ones will fit more tightly into the primer pocket. Do not overdo this step – about two seconds’ worth of countersink use will remove the crimp. Do not go too deeply. There are specific tools made to remove the military crimp but the countersink will do the job most of the time.
4. Lube your cases by using the lube pad mentioned above.
5. Resize and decap (remove the spent primer) the cases in the resizing/decapping die. Clean the cases afterwards.
Neck Size, Or Full-Length Size?
Resizing for rifles is a bit different than sizing handgun cases. If you are going to use the loaded ammo in the rifle it was just shot in and if the rifle is not a semiauto, you will generally neck size the case. This means the case is not pushed all the way into the sizing die, but adjusted by trial and error to size just the neck of the case to where the angled shoulder starts. This keeps the brass from being overly-worked, which prolongs case life. Neck sizing also improves accuracy. Neck sizing is not generally used with ammo to be fired in semiauto rifles, as cartridges need to be full-length-sized in order to insure they will chamber. Bolt rifles can be more forgiving. Usually, if you are loading for one bolt rifle, neck sizing will usually suffice. Simply put a vertical line on the case neck with a permanent marker and run it into the sizing die. Adjust the die downwards incrementally with subsequent runs until the line is “erased” right at the shoulder. Lock the die at that position.
6. Seat a fresh primer.
7. Charge the case with the pre-measured powder charge decided upon.
Powder charging is where loading for rifles usually departs from handgun loading. Proper powder charging methods will, by and large, determine the level of accuracy your rifle exhibits with the specific load you’re assembling. I find that when I weigh each and every load on my digital scale, I get really great results downrange (provided that proper case preparation and bullet seating has been done, of course).
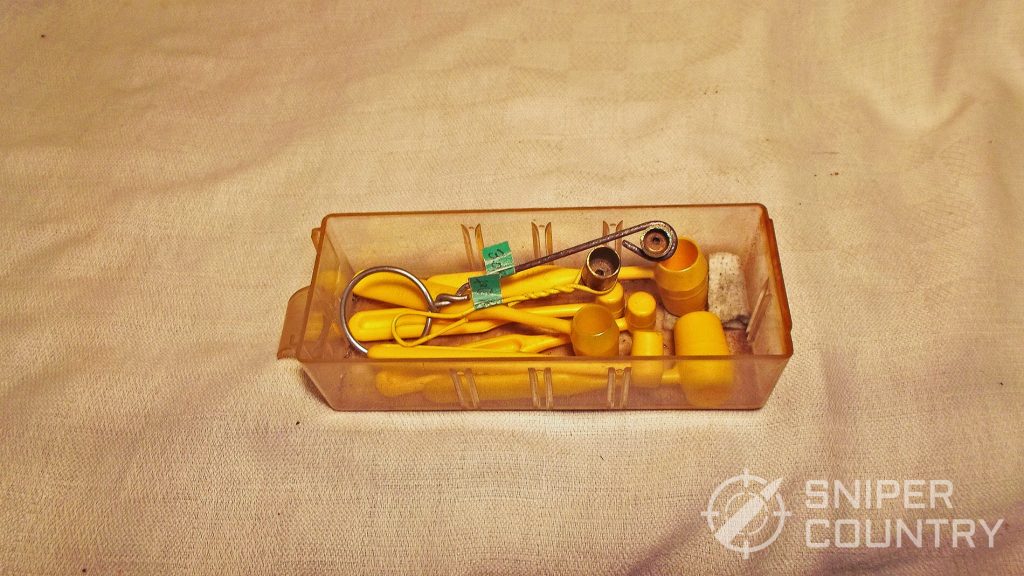
My method is simple: put powder in the digital scale’s powder pan by either throwing an undersize-weight charge from a powder measure or by dipping powder using powder dippers.
Remember, we are only trying to get close to the desired weight. I will then set a powder trickler next to the digital scale and trickle the remaining few grains in until the desired weight is obtained.
8. Once the case has been charged, carefully seat the bullet. Usually no crimp is needed or desired with modern tapered-shoulder rifle cases.
9. Inspect the loaded rounds and store them as described previously.
That’s the process for producing accurate rifle loads. My Savage .243 puts three bullets into a sub-half-inch group at 100 yards using these methods. Attention to detail and consistency are the factors that allow for great accuracy.
Precision Rifle Loading Equipment
The above steps and equipment work for me, an average shooter and hunter. But if you are into rifle competition, long distance shooting or other precision-based rifle hobby, you will go into extra detail in order to wring the absolute most accuracy out of your rifle. This starts with the rifle itself, but that’s not the scope of this article. Many rifle reloaders will utilize very expensive precision equipment in their handloading process.
Here are some examples of precision equipment that precision rifle shooters might employ that differ from the equipment discussed above:
- Bench Rest Competition Dies – dies manufactured to extreme tolerances. Some dies use a micrometer-based bullet seating plug in order to be as precise and repeatable as possible. A few thousandths of an inch can make or break a load.
- Case Prep Stations that perform several functions in order to get all case mouths, lengths and primer pockets totally uniform. These stations will trim the case to the proper length, true the case mouth and swage the primer pocket if needed.
- Case Neck Thickness Gauge – a gauge that, when held against a case neck while the case is rotated, will determine if the case neck is truly the same thickness all the way around.
- Precision Powder Measuring/Dispensing – there is equipment available to allow the powder operations to be performed more precisely, usually involving a digital scale with a built-in powder trickler that both weighs and dispenses .
These are only a few of the enhanced precision tools used by discriminating shooters...there are other items available but are beyond the purpose of this article. For the majority of rifle reloaders, the steps described above will more than suffice.
Special Offer: Join our private community and get exclusive gun deals, handpicked gear recommendations and updates on law changes, every day!
Join our private community
To Sum It Up
Reloading your own ammunition can be a rewarding hobby in and of itself. The cost savings over factory ammo can be a factor, but not all reloaders are in it for that reason. The ability to custom-tailor loads for your firearms is a major reason that shooters get into reloading. No matter what your motivation, give it a try...there are kits out there that you can buy very reasonably that have everything needed to get started. You won’t be sorry you did!
Notes and Links
The photos provided were taken by me and are of my equipment (except the progressive press). You will notice that most of my equipment looks well-used...that’s because it is. My RCBS powder measure and single-stage press date back to 1978 and have had improvised repairs performed over the years. I do not know how many thousands of rounds I’ve loaded with this equipment, nor do I know how many thousands more will be produced. My purpose in mentioning this is that, once purchased, good reloading equipment can last a lifetime.
Here are some links to companies that produce reloading equipment. I use a lot of Lee equipment – for the money, it’s hard to beat. But that doesn’t rule out RCBS, Hornady, Lyman, etc. – it just depends on how much you wish to invest up front. All of these companies produce fine products and most will have discounted kits with everything you need to get started.
Lee
RCBS
Hornady
Lyman
Dillon
Redding
These are the major players in the reloading equipment game. There are others but a kit from any of these companies will get you started in good fashion. Don’t forget the reloading manual(s). There’s nothing quite like the feeling you get when you put several bullets into a tiny group with ammo that you made yourself, or the thrill you’ll get as that deer drops when hit with your reloaded bullet. So, why not try reloading?