
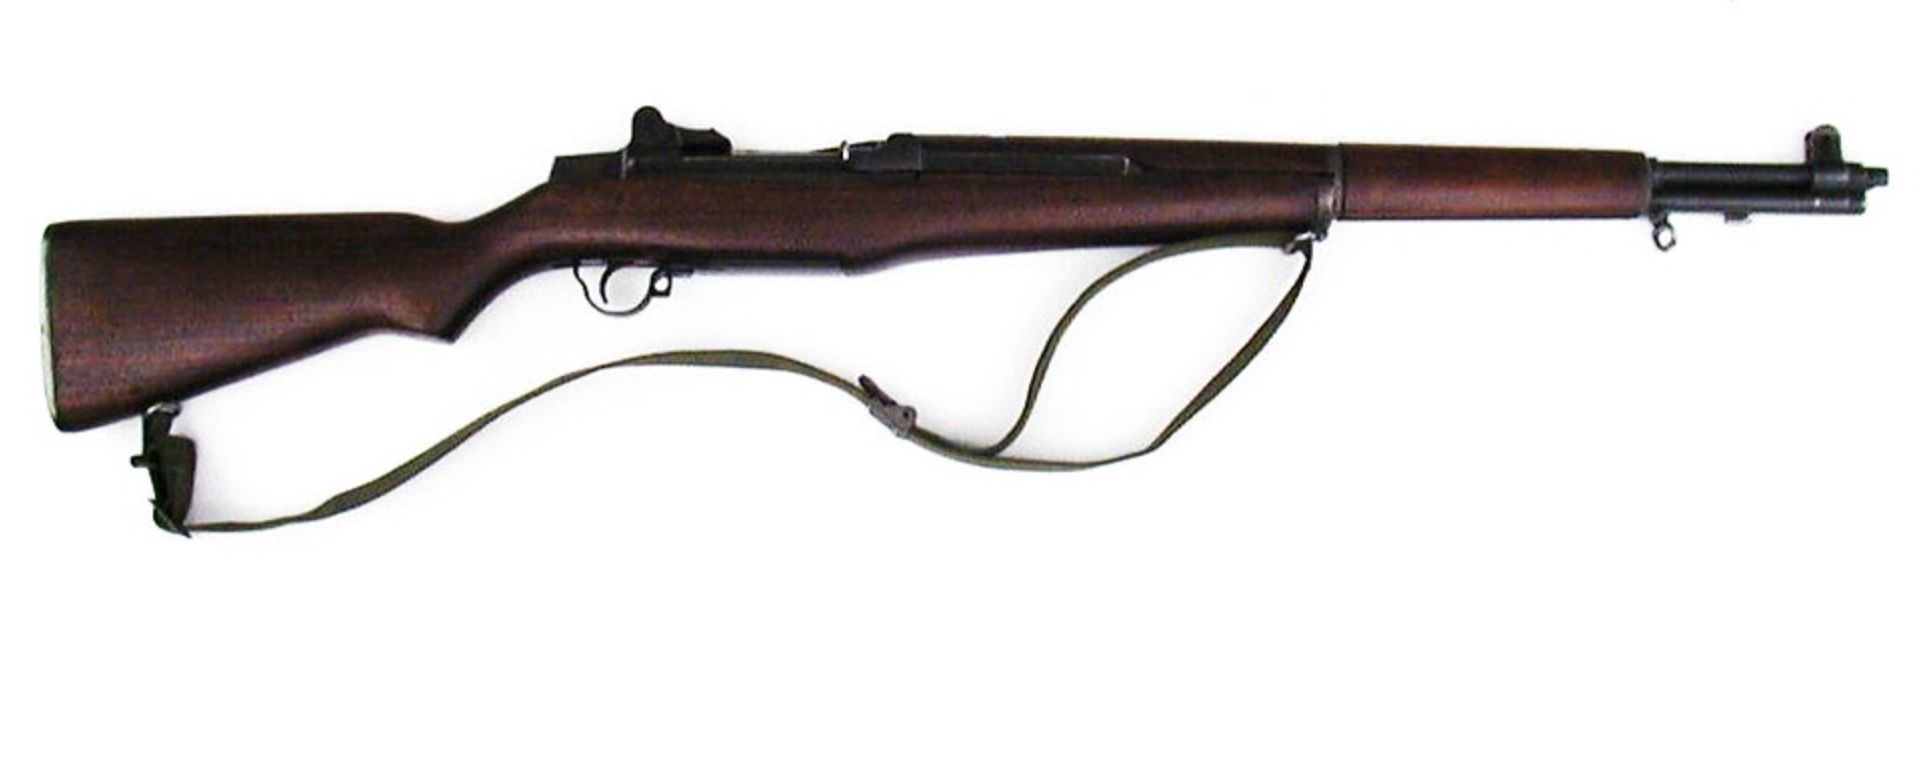
In World War II, bolt-action rifles were widely used by all sides, but it was the M-1 Garand semi-automatic that really stood out. Besides firing a hard-hitting caliber .30-06 round at distant targets, the M-1 was favored by troops as it was a solid and reliable weapon that was easy to clean.
While the M-1 Garand was exceptional in battle, it’s not competitive as a target rifle straight out the box, although it’s typical for a CMP-issued rifle (Citizen Marksmanship Program) to shoot 3 MOA or even worse. However, several techniques can be applied to improve the accuracy.
Working on a Garand is a labor of love using patience, care, and attention. It’s very different to working on an AR-15, which can be easily improved with a free float tube and some tools. Accurizing the M1 is not a quick job and it would be more realistic to break it down into a series of weekend projects. Some tasks take only 15 minutes while others can take the whole weekend, such as completing the basic bedding. Note that only a few tools, including a Dremel tool, are needed to work on the Garand.
The result effect is a rifle that can compete in high-power matches, but it probably won’t be able to stand as an equal against the AR-15. Participating in the John C. Garand matches requires the use of an original and unchanged Garand; however, you can still shoot in the service or match rifle category if you’ve bedded the rifle and made enhancements such as adding a new NM front sight.
Because so many Garands are still in circulation they cost half the price of an AR. So, if you want to get into the high-power game, accurizing is inexpensive and the best way to learn about any rifle intimately. Taking the time to make adjustments that improve the shooting precision will be worth every minute.
An example of how performance is increased when a gun is completely accurized with a high-quality barrel is the Fulton Armory Peerless Grade that guarantees sub MOA using Federal Gold Medal match ammunition. The chances of achieving this are slim if you’re using the GI barrel on your CMP rifle, so the ultimate goal should be getting your rifle to shoot close to MOA.
Another example of what adjustments can do is when the CMP issued a Danish Garand with a VAR barrel that shot 168 grain Sierra bullets riding on top of 46.0 grains of IMR 4895 powder. After accurizing the Garand in a DIY project, the group size was significantly reduced to just under 1 1/2 MOA from 3 MOA.
This article is the first in a series on how to accurize an M1 Garand.
The content presented in this series is for anyone with a keen interest in the M1 Garand. However, application of the information is aimed at professional and amateur gunsmiths who are fully aware and compliant in the principles of safe gun handling. Improper use could result in injury or death. Refer all queries or issues to a skilled and professional gunsmith. Any action or work performed is done at the risk of the reader and no liability is assumed whatsoever for the use of the information contained herein.
Part I. The Planning
Firstly, if you don’t have a Garand, you’re going to need one.
It’s highly recommended to start with borrowing a Garand from the State Rifle & Pistol Association and get a feel for its shooting in a high-power or Garand match. It will also allow you to buy a Garand rifle from the Civilian Marksmanship Program if all their citizenship and general requirements are met.
The qualifying requirements are available on the CMP website under the application provisions. A Service Grade or Danish issue Service Grade rifle is a good choice and better yet if you can get your hands on a Danish issue Service Grade with a VAR barrel.
The Danish issue is approximately $450 including shipping. Remember It’s a used rifle but the condition should be more than satisfactory. And, it should have a barrel throat erosion of 5 or less for at least 4-5,000 rounds of barrel life.
If you don’t want to spend too much on building an actual match rifle, don’t just buy the receiver thinking you will get the parts kit another time. However, if you purchased the receiver, it should be sent to Fulton Armory or Krieger for correct fitting and headspacing to ensure the barrel dimensions are right and the chambers are safe. All this adds another $550 before you’ve even purchased the other parts kit, which is about $500. In the end, you would’ve spent $1200 on a non-competitive rifle. It’s also advisable not to purchase an imported rifle from Korea or somewhere else as you will be disappointed with the product. Heed this advice.
It is estimated that for every 1,000 rounds shot through a barrel, one point is added to the erosion gauge. So, a barrel with 5,000 rounds shot through it, will have an erosion gauge of 5. Because the CMP only guarantees their Service Grade on an erosion gauge of 5 or less, you could get a Garand with a barrel that shot anything between one and 5,000 rounds.
Maybe get a rack grade rifle, shoot off a few thousand rounds at the range then send it to Fulton Armory to get a new barrel. It’s not a guarantee, but many of the Garands from CMP are rated 3 or less on the erosion gauge, which means there’s still a lot of life left to start your high-power game. As a note, the erosion gauge isn’t an exact science and some barrels shoot well past the 5 gauge.
When purchasing the Garand, it will be useful to get the following two books as well: The M-1 Rifle, PB 01660 for $3.95, through the NRA online store under Books, Reprints; and Roy Baumgardner’s, Precision Shooting the M1 Garand, available from Brownells for $12.95 (Part # 113-000-003). Although the publications are dated, the detailed instructions and information on accurizing a Garand are steadfast principles that are invaluable and relevant today.
If you’re not shooting your Garand in the John C. Garand matches and intend to bed the rifle, you should invest in the following Brownell tools to do the bedding properly.
The Spacer and U-Bar $31.08 (Part # 080-727-001). It’s possible to make these at home with a hand file from a 1″ piece of aluminum ¼†strip and a 3/16th steel rod. The downside is that it takes forever and a day to get the spacer right, so it’s probably best just to buy one. If you want to get carried away and go to town, there’s plenty of accessories to choose from. Like the Accuracy Speaks match front sight for $30.00 (Brownells part #851-100-101), which you’ll want to keep covered with a $10 front sight protector (Brownells part # 100-000-323).
It usually takes about 60-90 days to get your rifle from the CMP. It’s a long-anticipated delivery so getting a single shot adaptor (Brownells part # 100-000-399 for $29.95 or Fulton Armory “SLED†for $11.95) and a dry fire device at the Fulton site will ease the painstaking wait. A dry fire device is useful to practice firing the Garand (unloaded) at home. This device costs about $9.95. The single shot adaptor shoots single shots to avoid a “slam fireâ€.
What is a slam fire? The Garand has a free-floating firing pin. The AR has the same, more stable feature with less chance of a slam fire. When a slam fire occurs, the bolt slams home into the battery. The firing pin has enough force to hit and ignite the primer before the bolt locks up. This can have a deadly outcome. The “SLED†reduces the speed of the bolt to minimize the risk of a slam fire.
An important note on shooting in the M1 Garand or M1A, regular primers must NEVER be used in reloaded ammo, only mil-spec primers. Currently, CCI is the manufacturer of the CCI Military Large Rifle #34 primers. They are available from Wideners at $102 for 5,000. These primers have a robust shell to avoid a slam fire ignition. Specifically, for the M1 Garand, remember that when reloading the rounds, check the primer is properly seated. If it protrudes, even slightly from the case, the chances of a slam fire are tripled.
The shopping doesn’t stop there. As a tip, a lot of the rifles from CMP stock are quite greasy so getting a replacement like Boyds for around $80 could be very useful. You could try a synthetic stock (Brownells # 231-001-100) for $70 but (and it’s a big But), synthetic stocks are illegal in the Garand matches and there’s doubt if they can hold a bed. Bedding a synthetic stock can be a bit too tricky so going with a fresh wood stock is more practical. At the end of the day, if the accurizing was done well, getting a replacement stock isn’t necessary.
For those with skill and experience in bedding rifles, the Brownells Steel Bed kit at $36.90 (Part # 081-040-003) is great for the bedding compound. If you are unsure about the process or new to accurizing, it’s advisable to rather use Brownells AccuraGlas kit (part # 081-003-002 $16.70) or AccuraGel. This is because although the steel bed is solid and durable, it’s complex and the coarseness of the steel’s particle fillers can tear the release agent on action. Note the steel bed doesn’t absorb dye like the normal AccuraGlas, but they provide a decent effect. Finally, any error with any compound or technique can turn into a disaster.


A great article, but a bit out of date when it comes to the pricing of a CMP Garand.