bullets before “baking”

Why & How To: Powder Coating Bullets

In spite of the growing popularity and supply of jacketed bullets, many shooters still shoot cast bullets. Cast bullets are easily made at home or are inexpensive to purchase in quantity, are economical, and don’t require an elaborate set-up or supply chain to produce. (My bullets come from plain old wheel weights that a friendly tire shop is glad to get rid of.) Another plus is that cast bullets you make can be very accurate, versatile and useful. I can’t remember the number of deer I’ve taken over the years (not to mention squirrels, with the right load) with my .44 and .45 cast bullets.

Why Cast Bullets? What Are They?

9mm cast bullets and mould

Hard Cast or Swaged?

A quick explanation…all lead bullets are not necessarily cast bullets. Some are swaged in a press that forms the bullet from pure lead. These are not cast, but literally squeezed into a bullet shape. Cast bullets are made from pouring a molten lead alloy mix into a bullet mold. They are harder than swaged bullets and can be driven to higher velocities, resulting in a much better bullet for most applications.

Just How Hard Is Hard-Cast?

The Brinell Number Hardness (BNH) scale is a method of determining the hardness of metals. A BNH of around 11-15 is recommended for most cast bullets in the moderate velocity range. A 15 BNH hardness alloy for example would be 90% lead, 5% Tin, and 5% Antimony. Too hard is not good, either…like Goldilocks, we want the middle choice, usually around 12 BNH.

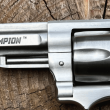
For many reasons, cast bullets are viable in the hunting field, on the range and for self-defense. From mouse-to-moose loads, cast bullets have proved to be game-stoppers for many years. In the early 20th century, Elmer Keith and Phil Sharpe among others used hard-cast bullets in the development of the .357 and .44 magnum cartridges at velocities that were guaranteed to go almost end-for-end through a decent-sized deer. Elmer Keith blew up a few guns developing his heavy .44 Special loads which evolved into the .44 Magnum. But he proved, to choose one example of his experiments, the penetrating power of a good, hard-cast .44 Magnum semi-wadcutter by shooting into a water tank after a .30-06 rifle had been shot into it and the penetration distance marked…his .44 went past the point of the .30-06 bullet and dented the far wall of the long chamber. The seminal semi-wadcutter bullet he developed, the Lyman 429421, is appropriately called the Keith bullet and is still extremely popular with reloaders (Best Reloading Presses) and commercial bullet casters.

Some advantages of cast bullets:

  • Accuracy
  • Economical
  • Easy to make at home
  • Many different styles of bullets are available; you can custom-tailor to your needs

But…Perfect, They’re Not

Bullets poured from alloy, whether in your garage or in a state-of-the-art factory, can be problematic. One of the main issues encountered with these bullets is leading in the barrel. Once pushed past about 1000 f.p.s., you start to see strips and flakes of lead in the barrel. There are two main causes for this issue: an undersize bullet bouncing its way down the barrel and stripping off lead, or a bullet cast from an alloy too soft for the velocity. Leading is a pain to remove, whether it involves a trip to a gunsmith or not. One DIY treatment is popular and usually effective – a piece of a Chore Boy kitchen scrubber wrapped around a brass bore brush dipped in Hoppe’s (Best Gun Oils & Greases) and worked back and forth in the barrel. Leading is an aggravation better avoided than addressed. There IS one way to improve upon the lowly cast bullet and its tendency to lead a barrel – powder coat it!

Powder Coating

Powder coated bullets and loaded cartridges

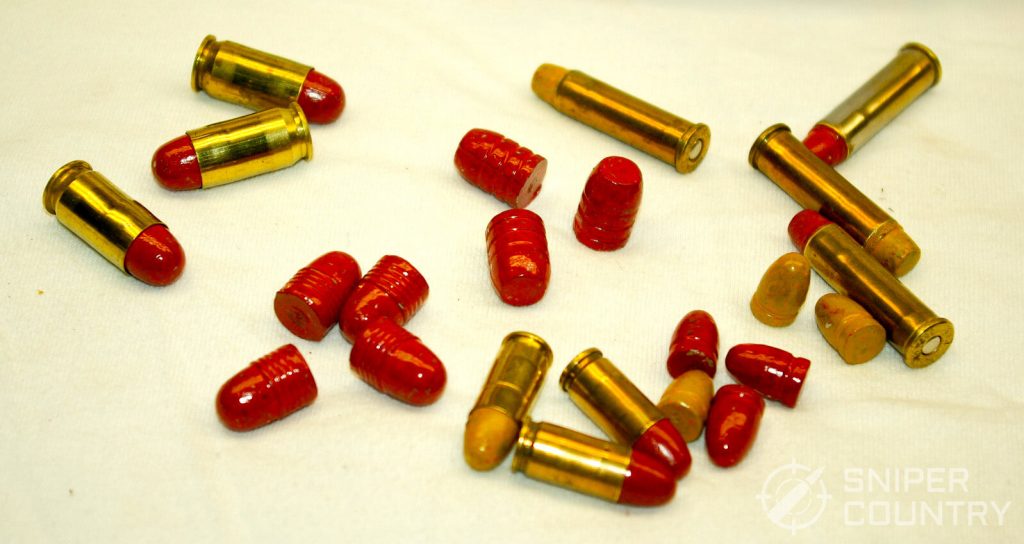
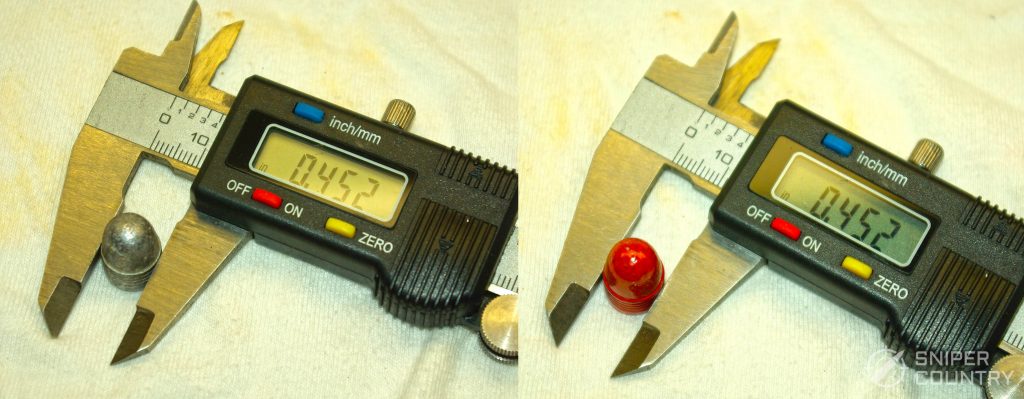
What, exactly, is powder coating? It is coating a metal part with powdered paint using heat, and is popular in industrial applications. But, for our purposes, powder coating involves taking a freshly-cast bullet (not lubed) the right diameter and baking on powdered paint in an oven.

That’s it. A very simple and inexpensive process brings about these advantages:

  • Cleaner shooting – there is no bullet lube to produce a cloud of smoke when shot
  • Customization – many different colors of paint are available. You can use different colors for different loads
  • Economical
One of the main advantages of shooting powder coated bullets is that barrel leading is greatly reduced. I’ve shot .45ACP powder coated bullets in my Glock 30 (with a Lone Wolf barrel) and have had to use nothing more than a plain brass brush and Hoppe’s with a few passes to clean the barrel, just about like cleanup after shooting jacketed rounds. When shooting plain cast, I usually have to resort to the Chore-Boy-scrubbing method.

In terms of customization, you can take a bullet for one specific load and paint it one color, and paint a bullet for a second load another color. You can also combine different color powders for a truly customized look. It is economical, as well…the whole set-up to get started cost me about $40, and ongoing costs are minimal.

Can Any Bullet Be Powder Coated?

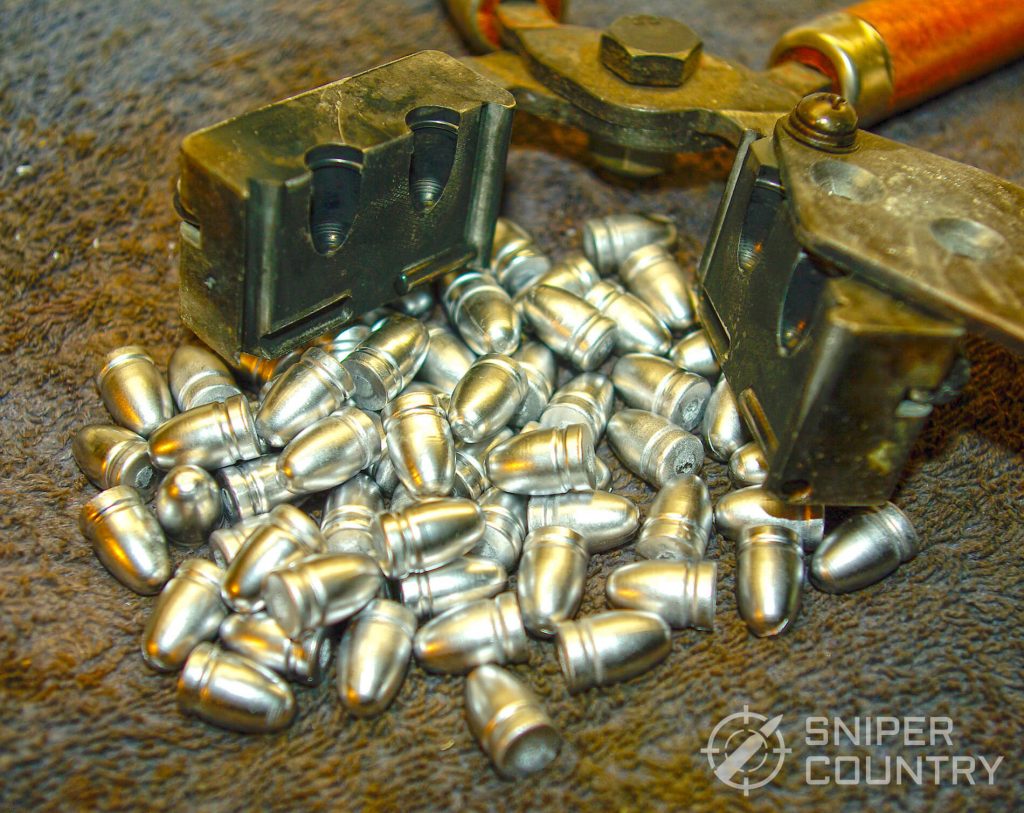
Pretty much any cast bullet can be coated. My experience shows that the Lee tumble-lube bullets work best, with their many small driving bands, but other bullets work as well. I’ve had success coating the bullets listed below, some of which are traditional-style semi-wadcutters with a large grease groove and a smaller crimp groove and others are tumble-lube or round-nose styles:

  • 124-grain round nose (9mm)
  • 260 grain RNFP (.45 Colt)
  • 200 grain H&G 68-style semi-wadcutter with traditional grooves (.45ACP)
  • 200 grain tumble-lube semi-wadcutter (.45 ACP)
  • 255 and 214 grain semi-wadcutters (.44 Magnum)
  • 158 grain semi-wadcutter (.357 Magnum)
One initial concern about powder coating is fear about adding to the bullet’s diameter. This is not the case; the layer of paint is very thin.

powder coated .45 bullet and digital caliper

Equipment Needed

Here is a list of what you need to get started in powder coating…
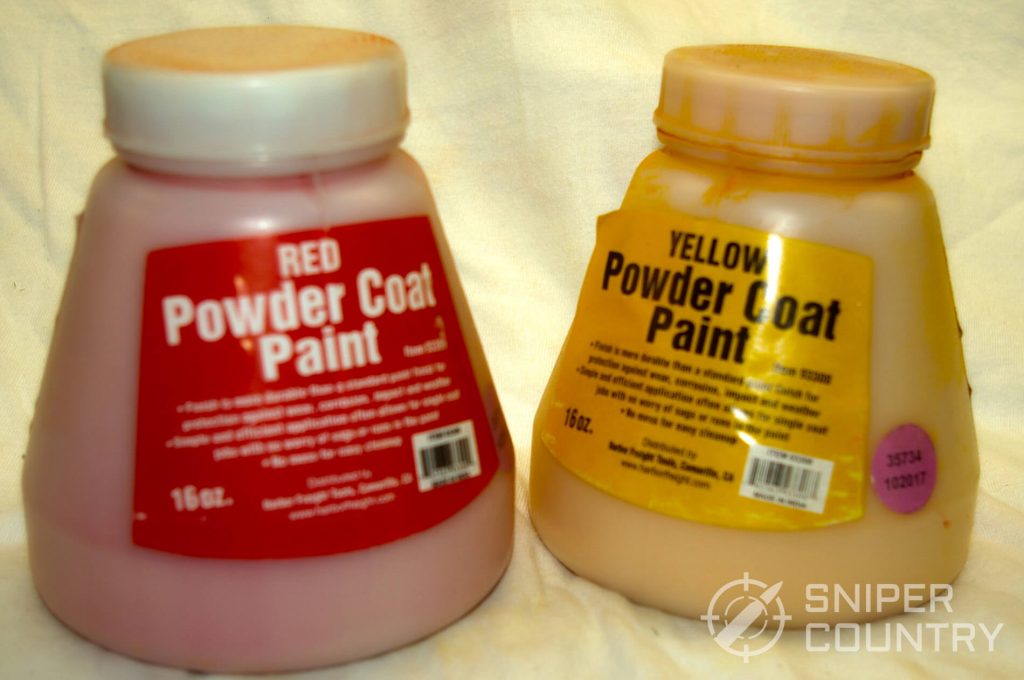
1. The paint

…here is a bottle each of red and yellow from Harbor Freight. They also sell white. There are other brands of powdered paint out there that have different adherence capabilities, other colors, etc. but these tend to be more expensive. The plain ol’ Harbor Freight paints work for me.

Harbor Freight Paint

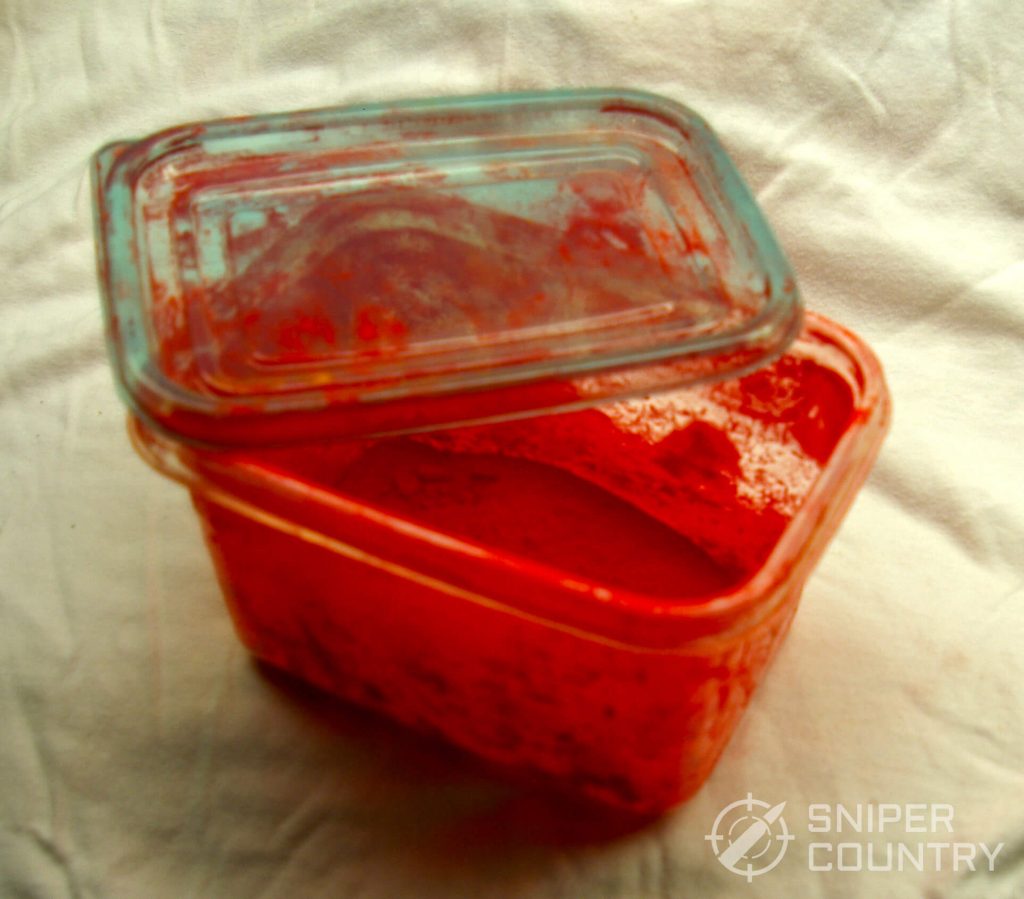
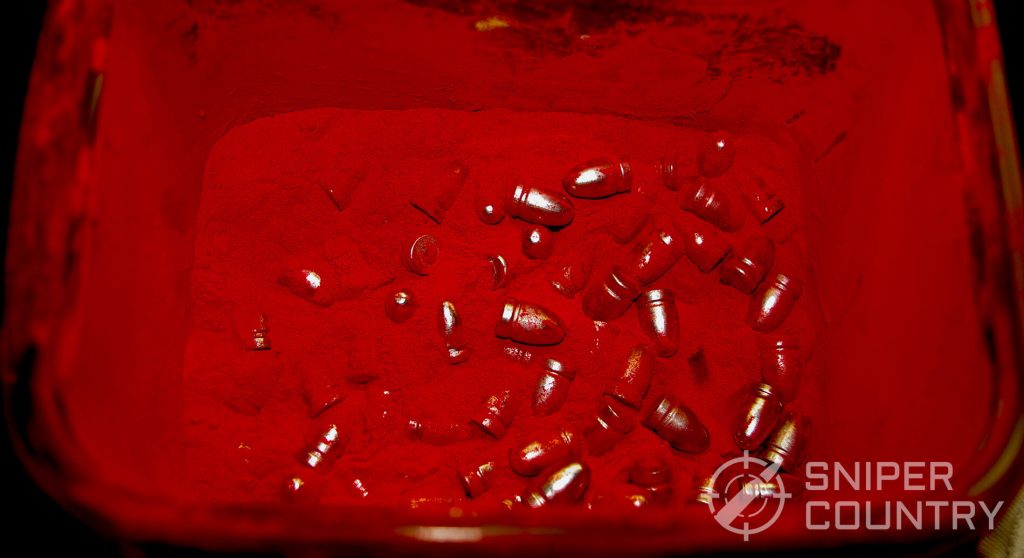
2. Some sort of tumbling container.

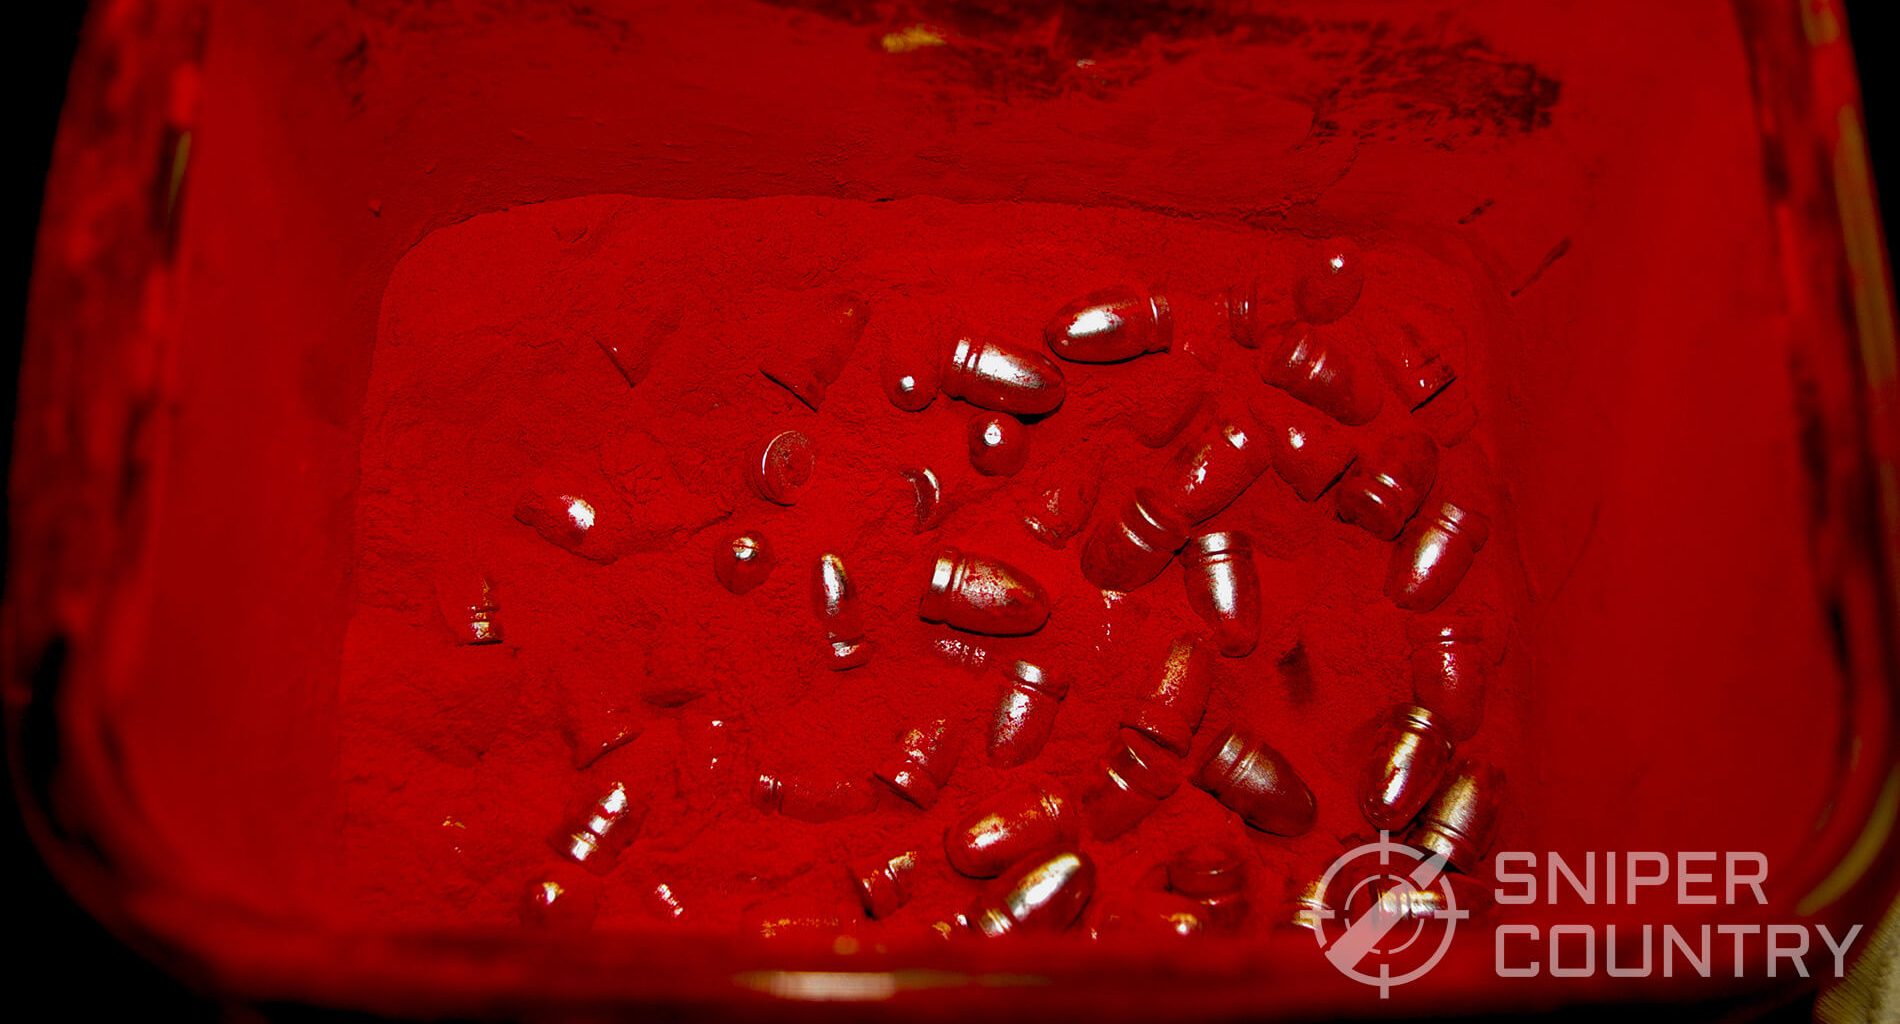
I use a couple of inexpensive snap-lid food storage containers, one for each color, but any suitable plastic container should work. You will put the cast bullets in this and add about a tablespoon of powdered paint. Of course, the amount of powder you’ll actually use is dependent upon the number of bullets you’re coating. I find It doesn’t take much paint…a thin, even coat is best. I have good results when coating between 50-100 bullets, depending on bullet size. Don’t try to do too many-a moderate number of bullets is best. As the old commercial said, a little dab ‘ll do ya! Too much paint will put a thick coating on the bullet and could even push it past the given bullet diameter you are trying to obtain. If you are using a plastic tumbling container, the type that seems work best and creates the most static electricity (which helps the paint adhere to the bullet) has a recycle triangle on the bottom with the number five. Shake, rattle & roll the container in a circular motion for a minute or two to coat the bullets evenly. A few voids with silver showing through here and there won’t hurt anything.

Typical powder container
Typical container

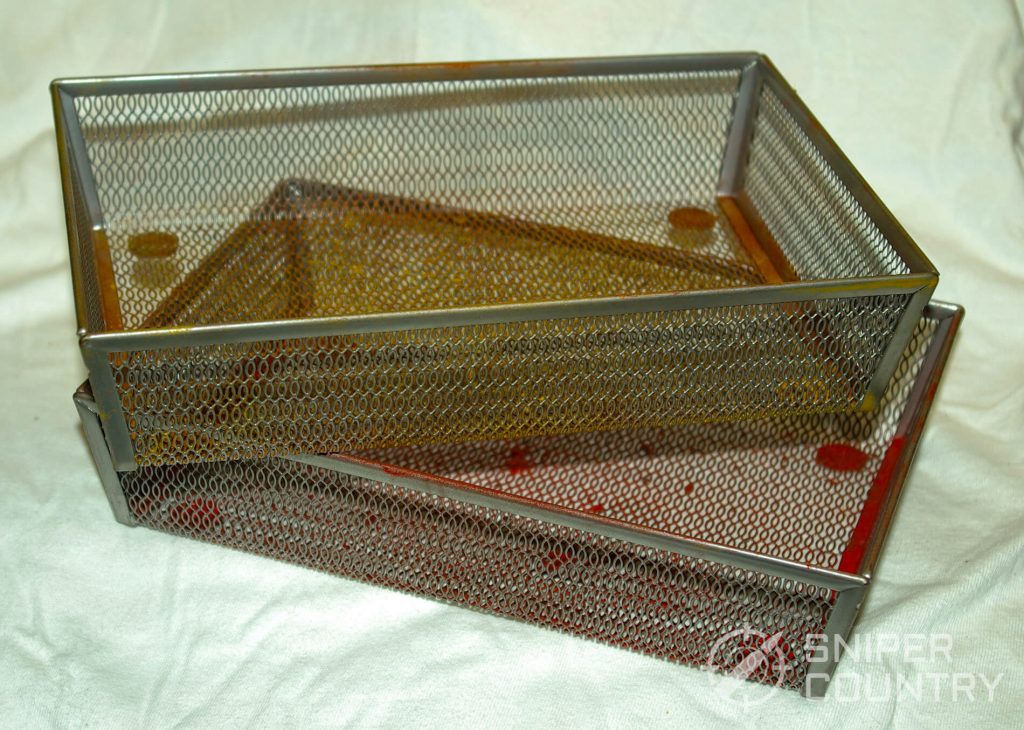
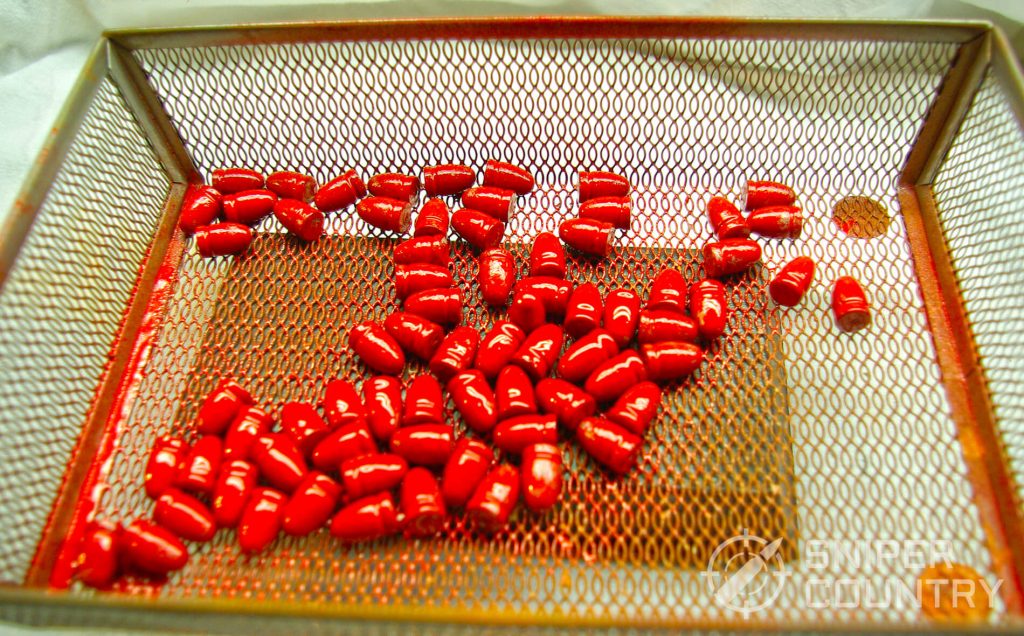
3. A heat-safe tray or two, to hold the bullets in the oven.

These were sold as office organizer trays for $5 each. You’ll need to try to spread the bullets out in the tray – you do not want them touching or sticking to each other if at all possible.

Trays used for coating
Trays

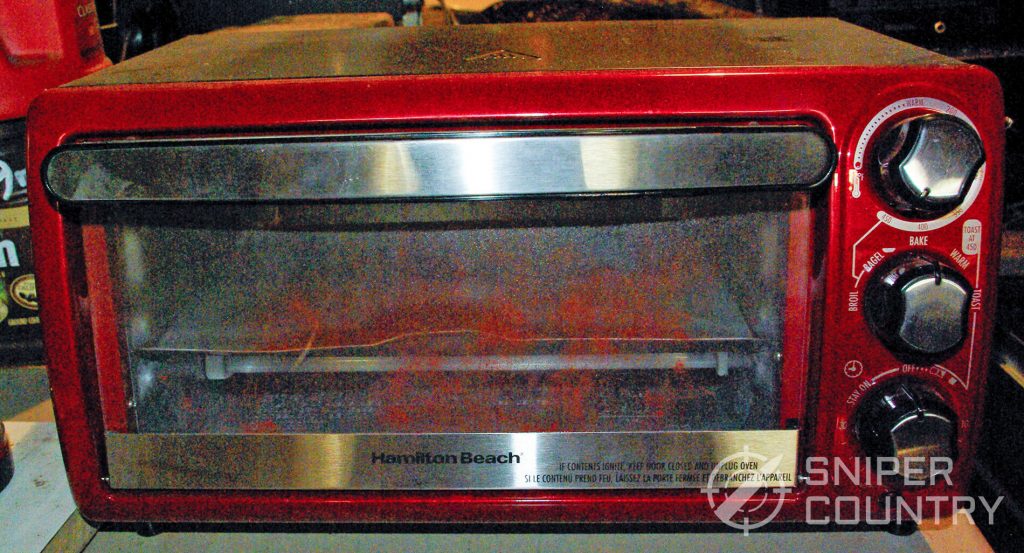
4. An inexpensive toaster oven.

The Hamilton Beach shown here was obtained at Walmart for $25. Whatever oven you use needs to be able to get to 400 degrees for 20 minutes…that’s all it takes. A safety note…use a dedicated coating oven. Do not cook food in any oven that’s been used for powder coating.

Inexpensive toaster oven

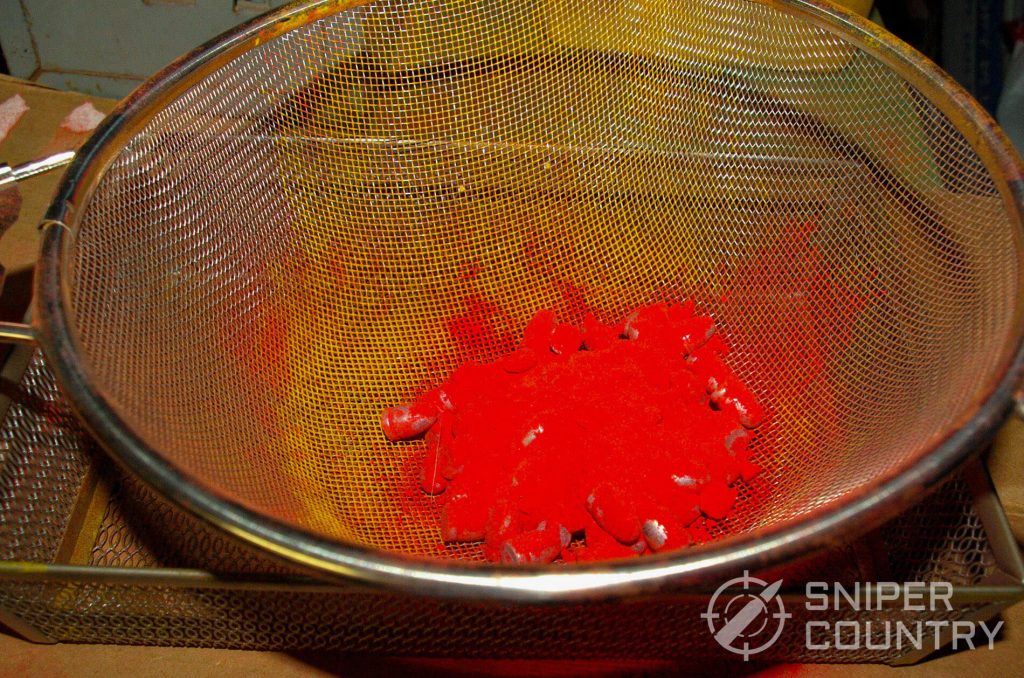
5. Some type of strainer or sieve to dump the bullets into

…so the loose or excess paint that falls from the bullets can land on a piece of cardboard to be reused. When finished with the process, empty the excess paint back into the tumbling container by simply folding the carboard lengthwise to make a funnel of sorts and channeling/tapping the paint into the container. As for the piece of cardboard, I use one side for red, the other for yellow…that way, the colors are not mixed. I then use a brush to remove all the remaining “clinging” paint from the cardboard into the container. I try to waste as little as possible.

Strainer/Sieve with brush

The Process

The easy way to powder coat bullets:

First, start with non-lubed cast bullets…

9mm cast bullets and mould

Next, put the bullets into a tumbling container and shake until all are evenly coated, about a minute…

bullets before “baking”
Bullets before “baking”

Pour bullets and paint into a strainer/sieve, then shake the excess paint onto the cardboard…

removing extra paint from powdered bullets
Removing extra paint

Place bullets in tray, then into the oven…

“Bake” for 20 minutes at 400 degrees. When timer goes off, pull tray out of oven. Obviously, it’s hot, so wear gloves!

hot bullets after baking
Caution: hot bullets!

After cooling for about a minute, drop the tray gently from a couple of inches up onto a hard surface to dislodge the bullets and to break them apart. Repeat, forcefully if needed, until all bullets are loose in the tray. You may then dump them onto that hard surface to cool, or leave them in the tray once all have been loosened. The initial 60 second cooling -off period is an important step – I’ve learned this the hard way. If you remove the bullets from the tray early, you stand the chance of the paint (which hasn’t set up all the way yet) coming off in globs as it is still somewhat “wet.” On the other hand, if you wait too long, they will stick to the tray and you may have to pry them off with a screwdriver.

After they cool, they are ready to load!

.45ACP 230 grain RN coated bullet loaded into case

That’s it. Pretty simple. You will have to experiment to find the right shaker container, the amount of paint needed, etc. for your needs, but this is what works for me. Some guys will put small plastic Airsoft balls in the shaker container with the bullets to add to the static electricity, or even use some type of spray gun to spray the powder onto the bullets…I’ve never found these processes necessary.

Need More Convincing?

Jacketed bullets are great, but with cast bullets you have an economical alternative that lets you custom-tailor your bullets to your needs. Full wadcutters for targets or defense, semi-wadcutters for hunting, round nose to feed in autoloaders…with powder coated bullets you can up the velocity a bit, avoid most leading and have different-colored bullets for specific rounds. One last advantage (at least the way I see it) – you’ll have “real purty” cartridges in your magazine or in your belt loops. They do catch other shooters’ eyes. They are cheap to set up for and make, very effective, allow easy barrel clean-up, and produce little to no smoke from bullet lube – what’s not to like? I was a skeptic at first, but now I coat all my cast bullets. The benefits are worth the time and investment.

References:
Fortune Cookie 45LC
Elvis Ammo
Johnny’s Reloading Bench

Total
170
Shares
70 comments
  1. A very thorough discussion. Sounds like a pretty good way to go. I appreciate the little tips, like how long to let the bullets cool out of the oven.

    1. It surely isn’t hard or complex…you just have to get the paint to stick to the bullets, and, after “baking”, let them cool enough to bounce them loose in their tray so they don’t weld themselves to the mesh. You’d figure it out the first time. Thanks for the comment!

  2. Powder coating is the best hands down…….. harbor freight powder works but an outfit called Eastwood has the best virgin coating… and so many colors to choose from.. I personally use gloss black only and it is way more durable than Harbor Freight powder.. I ought to know because I have given all the coated bullets the sledge hammer test… and this is the best!!!!

    1. That’s great that you found a durable-coating paint. I know that Eastwood makes good stuff…it’s just that the HF stuff has worked well for me and I can walk into our local store and pick it up. There IS something to be said for the availability of many colors, though…maybe baby blue would look nice, all lined up in the pistol’s magazine…I digress. Gloss black tells me at least that you mean business! Keep up the good work – thanks for responding!

    2. Thanks.. I was searching for the best powder to coat reloads and this answers my question.
      I still have a bit of Harbor freight to use up but will move to Eastwood for the future needs..
      Can the harbor freight be mixed in with the Eastwood powders to improve performance.?

      1. That’s a good question. I would assume, since both brands are basically just powdered paint, that you could combine them. The only thing that might happen is that they could coat the bullet differently, and you end up with a splotchy bullet. Certainly no harm in trying – you’re not going to raise pressures or anything like that. If you try, leave another comment with the results…thanks!

      2. I’m sure it can be but use up what you have and start fresh.. I use gloss jet black and it’s only 6 bucks a bottle and it is very durable.. I shoot 10mm. And .357 sig p/c bullets I cast and oh how sweet it is.. the barrels clean up so fast and zero leading pushing sigs over 1375. Good luck and happy shooting

        1. That sounds great…both of those rounds would produce prodigious leading with softer bullets and traditional lube. I’m assuming you’re talking about Eastwood gloss black? I may have to try it. It sounds great for midrange .44 Magnum loads. Thanks for your comment!

    3. 100% correct. Eastwood powders are far better than any others. The few extra dollars isn’t even relevant considering the number of bullets it will coat. Eastwood is also a great company to do business with.

  3. One thing that you can do to clean any lead residue from your barrel when shooting cast bullets is to add a brass or copper jacketed bullet every now and then to your magazine..
    It seems to pick up any bits of lead that a cast bullet might leave.
    Just a heads up for easy cleaning.
    Bill

    1. Bill, I’ve used that method for years. It seems the shooting community is divided on it…some claim that all you do is “iron” the lead deeper into the grooves with the jacketed bullet, while others (including Hickok45 – check out his video on the subject – claim that it works and has worked for years. I’m not going to tell you one way or the other…like I said, I’ve done it but I also use the “Chore-Boy-wrapped-around-a-brass-brush” method of getting the lead out, too. Thanks for commenting!

  4. I always lightly lube and size my cast bullets, but I didn’t read anywhere that said you size the bullets before or after powder coating. Do you need to size them?

    1. Lloyd, not usually. Lee tumble lube dies throw bullets very close to the correct sized diameters without sizing and the powder coat doesn’t add that much. I’d rather shoot a bullet a thousandth oversize than undersized…it keeps leading down.. Thanks for your reply!

  5. If you do have a leading problem there is a simple home brew solution. A 50/50 mix of white vinegar and hydrogen peroxide. Tape or plug bbl. pour in solution let soak, time can vari depending on level of leading.
    I was skeptical of this as I came across it on the internet (it must be true).
    I mixed up a small beaker full and dropped in a 38 spl. Almost instantly bubbles started rising off the slug. after about 10 minutes the slug was lighter by 10 grains.

    1. Carl, this method will indeed work but you’ve got to be careful with it. It can get pretty “active” if overdone. Under controlled conditions it will certainly work, but I prefer the old-fashioned elbow-grease method of a little piece of, or strands from, a copper cleaning pad (Chore Boy, etc.) either pushed by or wrapped around a brass brush. (Just make sure it’s solid copper and not copper plating over stainless steel). This definitely will not hurt the bore and has always taken care of the leading. I’d be careful will chemical solutions as some can be a bit caustic to the barrel. Just be careful…some guys will try different solutions to the maximum and end up pitting the bore. Of course, there’s always the Lewis Lead Remover, but the Chore Boy system does about the same thing for a lot less money. Thanks for the comment!

      1. I have never seen this attack steel barrels, I have never let it sit for more than 30 min.
        I was checking my molds and sizers and found my 45 apc mold is .451 and siser is .451,
        my 44 mold is .430 and sizer is .429, Do I have the wrong combos?

        1. Carl, I have only experimented with the solution – you’ve used it extensively so I will take what you say as authority on the subject. I must’ve tried it on a cheap gun (don’t remember) with maybe sub-standard steel in the barrel. It just looked a little rougher after the treatment. Maybe I left it in way too long. Anyway, if you say it’s safe, then I’ll go with that. As for the molds, usually you want your cast bullet molds to be .001 over the nominal bore size… for a .357-caliber bore, you’d want .358; for a .451-sized bore, .452. I use mostly Lee tumble lube molds that don’t usually require sizing, but if you are not sure about your cast diameters, borrow a micrometer (not a caliper) and really check them. As a way to help with checking your bullets, move (pound with a soft brass rod or something) a dead-soft lead slug through your bore and measure it with a micrometer at the widest points – those are the grooves – to see just what size you barrel is. Do 2 or 3 of these to get an average. Some older barrels tend to be a bit on the large size, especially in .45 Colt. (The forcing cone and chamber mouths of a revolver need to be uniformly-sized as well or you can swage a large bullet down as it passes from the chamber through a tighter forcing cone into the barrel, then you can get leading). I do have a Lee push-through .452 sizer for my .45 bullets (ACP and Colt) that I’ve used from time to time-depends on the mold. Some of my molds throw true .452″ bullets; others don’t. The problem with undersize bullets is that they can “skip” down the bore without really sealing against the grooves and strip off lead. I’ve had better results with bullets .001 or so over than actual-diameter bullets. Of course, this only applies to cast bullets…jacketed bullets are usually actual bore size.
          Thanks for your comment – hope all this helps.

          1. Thanks for the info. I really want to cast for the .44 mag as I just bought a Rossi .44mag lever action.
            I have several thousand 45 apc heads 185 and 200g. That should hold me for a while.
            I wanted to go the powder coating route for the .44, I have about 150 lbs of lead, a mixture of pure lead, Wheel weights and some unknown and some melted down heads.
            If I powder coat is lead hardness an issue?
            I have not received the Rossi yet so I don’t know what bore size is.
            I’ll have to slug it when I get It.

          2. Carl, Lead softness is not an issue with powder coating. Just coat ’em and bake ’em. I had a .45 Colt Rossi lever action and killed deer with it. It’s a great gun for the money. I don’t know what kind of molds you use but I always have good luck with Lee. I just got their tumble-lube SWC 240-grain bullet for the .44 – it’s accurate with my loads. I also have 2 of their “ancient” single-cavity molds (214 and 255 grain) that still work. Just remember that if you are really going to push the velocity, make sure your bullets are the correct size (good idea to slug your bore). Also, depending on what you’re using the gun for, the loads don’t need to be screamers – save those for the jacketed bullets. My load is about 1100 fps out of my long 629 – that would be closer to 1300 out of the Rossi, for example. Good luck, and if you have any more questions, write. Thanks for your reply!

      2. Beware of hydro embrittling. Any acid’ including vinegar will enter the micropores of the metal and weaken it.

        1. Dek45, as often as needed. I don’t have a formula for cleaning but usually if I shoot a gun more than a few rounds, I’ll clean it. I try to keep the barrel clean, rifling sharp and “grunge” cleaned out. Hope that helped. Thanks again for writing!

  6. Mike, I use a somewhat more tedious method to ensure I have complete and even coverage and no missed spots or melding of coated bullets together. After tumbling in a plastic container, I use a pair of tweezers to pick up the bullets individually and stand them on a cookie sheet with a piece of silicone baking paper on it (that is reusable a half dozen times). I tap the tweezers on the lip of the container to dislodge any extra powder back into the container to use on the next batch. (Call me anal but my bullet finish is always close to perfect.) As well, the powder coat I purchased (1 lb which looks like it will do about 30,000 9mm bullets at a custom 133 grain weight – actually a 124 grain Lee mold with the lube groves machined out) only requires 10 minutes at 400 F to cure but that is powder dependent. I agree the bullets are soft when they first come out of the oven but harden up in a minute or so. My understanding is that the “paint” is actually a plastic material and you melt it onto the bullets. Finally, I do size my coated bullets. Initial trials in my CZ pistol had some jamming on loading into the chamber when I did not size them.

  7. Mike, thanks for a very well written and informative article. I’ve been reading and watching a lot about powder coating bullets lately. I gave away my .358 sizer die for my lubrasizer a number of years ago and just replaced it with a Lee push through die. Knowing I already hate the Lee tumble lube method and dislike the sticky wax lubed bullets, this looks to be a great replacement for the mess.. If it works as well as everyone is saying, I may have to sell the Lyman I’ve had it for about 33 years but I keep too much stuff around so it may have to go!

    I bought a pound of Eastwood blue paint and will be trying it out as soon as I can find a suitable (and cheap) toaster oven. I like the sounds of the tweezer method some have replied about here so I may try it that way. I’ll post back here with my results.

    Bryan

    1. Bryan, We’ll be waiting to see how it works out for you. I got my toaster oven at Walmart for 25 or 30 bucks – check them out. Thanks for writing!

      1. I ended up getting a used toaster oven for 20 bucks and have processed, um, 4-5000 bullets so far. I bought Eastwood blue to start with and have since bought their black and periwinkle gray. Hey, they were the cheapest. Using the black by itself is difficult as it is a little bit “wetter” than the blue or gray. It clumps and goes on heavy. The bullets are beautiful gloss black but harder to do. I now mix it with gray or blue in 1 black and 2 other ratio and it works fine. These come out to a beautiful color ( I need to post some pictures) and I’ve commented they are too pretty to shoot. Here is what I’ve cast: 130 gr 30 caliber with gc, 200 gr 45cal, 230gr 45cal, 77gr 38cal (load 2 at a time for a great self defense load),150gr 38cal wc, 210gr 44cal, 250gr 44cal. I’ve had really good luck coating the bullets. I bought a silicone matt and have been standing the bullets on their base and they come out perfectly like that with zero imperfections. It takes a little longer but I want to limit the imperfections which become a variable that could affect performance. The 30 cal I have to be a little careful, everything else stands on ist base very easily.

        We shot 20 of the 130gr out of a 308 with a load of 15gr blue dot. New gun, lousy scope, and we were just making noise and seeing if they would shoot and if they left any lead in the barrel. They shot ok, 1.5-2 inch groups at 80 yds and no lead in barrel. We shot 18 rounds of the 250gr 44cal out of a S&W 29 and If I remember correctly (and I may not be) it was 12gr of blue dot. Just shooting at a steel plate offhand. They went bang and left no lead in the barrel. The real test will be this weekend. I have a Marlin 1894 in 44mag and 4 different loads to try. I’m going to start looking at accuracy and really testing the no leading issue benefit of the paint.

        Part of my testing involves sequence of paint and sizing. I’m testing paint then size, size then paint, paint no size(just for the 210gr 44cal because it drops consistently at .429.

        For sizing I have a Lubrisizer for 44cal, 45cal and 9mm (haven’t done any yet) and Lee push through sizers for 30cal and 38cal. I love the Lee sizers btw, after this demdemic, I’m going to get a .430 and a .452. I’m not putting any pressure on the Lubrisizer, just sizing only.

        That’s the report so far other than the bullets are so much nicer to handle when painted. Just like loading jacketed, very clean. It makes me anxious to get rid of all the slick lubed bullets I have.

  8. very informative and inspires me to try. Can I purchase cast bullets, then coat them. Is that defeating anything or cheating skipping steps? Great article Mike!

    1. Mike, I suppose you could do that, but you’d have to specify when you order them that they not be lubed – the lube would melt and burn off in the oven and you’d be in a mess. Other than that, you should be good to go. Thanks for writing!

    2. You can start casting fairly cheap with Lee equipment and it’s part of the hobby/enjoyment of it. I’ve been casting up a storm lately!

  9. Great article! I’ve been powder coating for some years now and I see we use basically the same method. Just me, but there are a few things I do differently, I use the office organizer tray to sift the bullets from the powder. I then bake them on parchment paper or nonstick aluminum foil. I think the paper works best. When I take them out of the oven, I dump them directly into a bucket of water. I always use bullets”as cast” then run them through a Lee push through sizer. It does absolutely nothing to the coating. I’ve been casting for well over 50 years and powder coating is the best advancement I’ve seen. No more leading, no more smoke and no more sizing and lubing!

    1. Jerry, sounds like you’ve got it figured out. Your method is not that different from mine, and I always say use whatever works. I do have a question…what brand of paint powder do you use? Just curious. Thanks for writing!

      1. Mike,
        I use ‘Powder By The Pound’. Mirror Blue and Emerald Green work great. I’ve never used HF so I can’t give a comparison.
        Jerry

      2. Mike I find that using 400 deg. for 20 min. seem to get the bullets to dark and not the shinny red that i am looking for I have changed to 360 deg. and 17 min. works better but if they need ;to be brighter I give them a second coat. I also use the water quenching.

        1. Walter, I’ll have to try that. I just, today, ran a batch of 9mm bullets through the oven and did notice they were a bit dark. I’ll try your settings. Thanks for the advice!

  10. I have recently go in to shooting cast bullets There a manufacture less than 15 minutes from my house . He sell them sixed and lubed . is there a process that you know of to powder coat these bullets. I was thinking that i could tumble them in crushed walnut for 15 to 20 minutes to clean of the lube to coat them. thanks .

    1. Michael, I would see if he would sell you the bullets just sized, not lubed. That may be an issue given that most sizers require the bullet to be lubed first, but if his casts are close to the sized diameter needed, he may not need to size them. I know I don’t size Lee tumble-lube bullets and they are fine. I’m not sure if tumbling them would remove all the lube, and you don’t want any lube at all on them if you are going to powder coat them – that would be bad.
      Or, you could invest in a Lee push-through sizer for about $25 for each bullet you shoot and then just push them through the sizer die after powder coating them. That might be the simplest solution. Let us know what happens – thanks for writing!

  11. If you get leading at 1000 fps you have a bad lube or poor bullet fit. 1400 no check, 2000 with gas check are normal. This said powder coating is an excellent option for those not wanting to mess with lubes. About the only drawback is with black powder, you need lube. Otherwise works well!

    1. Jon, you are right. I found that, by powder coating, I quit having to mess with lubes and it surely cuts down on the leading as well. I appreciate your comments!

  12. Mike
    I am trying your coating process and am having difficulty getting the powder coating to coat the bullets before baking. Just plain lead 9 mil round nose. Should they be warmed before trying to coat them? If so what temperature? Room temp is 65.

    thanks
    Phil

    1. Phil, yeah, try warming the bullets first. A few minutes in your oven at 150 or so should help the powder to stick. I’ve had that trouble, too. Let us know if you success with the warmed bullets. Thanks for writing!

    1. Denny, how long are you leaving them in the oven? I go for no longer than 15, maybe 20 minutes tops. As few as 10 minutes might work. You just want the paint to set. Also, are your bullets plain lead or are they from an alloy? I usually use wheel weights and they stand up to 400 degrees with no problems. Check your alloy to see if it’s plain lead. If so, it’s no wonder they’re melting, as lead melts at 416 degrees F, if I remember right. Anyway, try a lower temp (250-300 degrees F) for a slightly longer time or use a harder alloy. Keep us posted with the results, OK? Thanks for the comment.

  13. what seemes to be the best pre size for the slugs to be coated is say 44 cal should besized 429 9mm should be 356 etc ?

    1. Steve, I would just stick with the recommended cast bullet diameters for each caliber… .358 for .38/.357 and .429 for .44s. .430 should work, too…just experiment. The coating shouldn’t affect the diameter that much, but it you want to, try sizing them after coating. I use Lee loads that drop bullets at those diameters, so my sizing equipment isn’t used a lot. Keep us posted on your results, OK? Thanks for writing!

  14. This is very interesting. Sounds like it might be the solution for shooting Yellow loads with my Hammond Game Getter device, to reduce lead fouling. I’m going to try it.

  15. I tried to coat my bullets as per your instructions, My finished product is not shinny as yours appear in the pictures. Am I doing something wrong.

    1. David, the shiny factor is one that baffles me from time to time. After a bit of experimentation, I find that if I pre-heat the bullets a few minutes at a low temperature and then make sure the paint powder has been kept warm as well, the bullets tend to come out shinier. In winter, in my unheated garage, I’ve had problems with the cold when I didn’t preheat things. Try the warm approach and let us know if that helps you. Thanks for writing!

  16. Hey mike I tried your suggestion to heat powder & bullets Almost ruined my new bottle of eastman lol. However I found that heating the eastman pwder is not necessary. Eastman seems to adhere better than the other powder in your directions.
    The bullets I coated with Eastman came out great shinny and all ,I will eventually try the heating process with the other powder. Thanks

    1. David, interesting that the Eastman powder made shinier bullets… I’ll have to get some of that! The Harbor Freight powders are OK, but there are other powders out there that give very consistent results. Thanks for letting us know.

    1. David, I feel your pain. I even called it Eastman myself – I know better. Like I said elsewhere, getting old ain’t for sissies! Thanks for your comment.

    2. I’ve recently had a problem with the HF paint . The .38 spl. I loaded are very tight going into the chambers of the cylinder. the Eastwood still slide without restriction , I did give the HF cartridges two coats to get a glossier finish, I’m sure that did not help. The Eastwood is a one coat operation with shinny, smooth complete coverage.

      1. David, I think I’ve had that experience as well. I have decided to give just one coat with the HF paint – it isn’t as glossy but still works well. Again, thanks for sharing your expertise!

  17. Hey Mike I have a question for you, I want to buy a ,223 bullet mold but there are two diameter molds available Is the ,225 diameter mold made for AR 15 Rifles in ,223/ I know the .224 is but not sure about ,223

    1. David, .223 bullets are actually .224. If we use the same rule that we use for other cast bullets, we would buy a mold one thousandth over finished diameter – in this case .225. If you try try that, let us know how it works, OK? Thanks for writing!

    1. James, I’ve never used gas checks but I would imagine so. The coating helps keep leading down – anyone else out there have experience with this? Thanks for writing!

      1. I think the gas check would still be needed in High velocity cases as a rifle or pistol whenever directed, This is due to the nature of the softer lead. I’ve loaded some 30-30 but have not tried them yet.

        1. David, yeah, for higher-velocity loads you’d need one. I usually just do handgun non-magnum loads so I don’t use them. Thanks for your comment.

    1. Roger, I’ve never seen any pressure signs from my coated bullets that weren’t there in regularly-lubed cast bullets. The only way I might expect a slight pressure rise would be if the coating was so thick that it made the bullet diameter greater than it should be, but I would think that pressures might be raised a tiny amount, if at all. Plus, the bullet probably wouldn’t seat in the case easily and would give itself away. Anyone else out there have experience with this?

Leave a Reply

Your email address will not be published. Required fields are marked *

Related Posts
M1 Garand shot by Mitch Barrie
Read More

Accurizing An M1 Garand

In World War II, bolt-action rifles were widely used by all sides, but it was the M-1 Garand semi-automatic that really stood out. Besides firing a hard-hitting caliber .30-06 round at distant targets, the M-1 was favored by troops as it was a solid and reliable weapon that was easy to clean. While the M-1 ... Read more
Two fluted rifle barrels
Read More

The Real Benefits of Barrel Fluting

In this Article: Weight Savings, Rigidity and Heat DissipationPotential Problems and Barrel HarmonicsPractical ApplicationsAutomatic WeaponsSemi-Automatic and Bolt ActionPistol Depending on who you ask, a fluted barrel is either the solution to all your woes, or a complete waste of money. Few would deny its aesthetic appeal, but a purely aesthetic improvement can be hard to ... Read more
5.56x45 NATO Cartridge filled with bullets
Read More

The History of the AR-15 and 5.56×45 NATO Cartridge

Table of Content The 5.56×45 Origins and AR-15 Initial Reviews (1950- 1960) The AR-15 Wading through the Muck (1960-1962) Questionable Results and A Breakthrough (1963) More Modifications to the AR-15 (1963-1967) Problems in Vietnam (1965- 1970) The 5.56×45 and NATO (1967-1980) Moving Towards Modernization (1969-2000) The 5.56×45 Modern Era (2000-Present) The 5.56×45 Going Forward Of ... Read more
.357 Magnum Ammo
Read More

.357 Magnum vs .44 Magnum – Cartridge Comparison

In this Article: RecoilBallisticsTrajectoryStopping PowerAccuracyPrice and AvailabilityApplicationsBest Rounds The two cartridges we are going to look at in this article, the .357 vs .44 Magnum, are steeped in American culture and tradition. They both also serve some of the same shooting niches including hunting and self-defense. In this article, we will take a look at ... Read more

Talk to me

Hi! I'm Mike, one of the oldest writer of Sniper Country! If you have any feedback or question about my articles, please submit it here, it's always appreciated!

[contact-form-7 404 "Not Found"]

Claim your targets for free (worth $99)!

Join 212,000 avid gun enthusiasts and claim your print-at-home shooting drills. Receive exclusive gun deals once a week and all our great reviews right in your inbox.