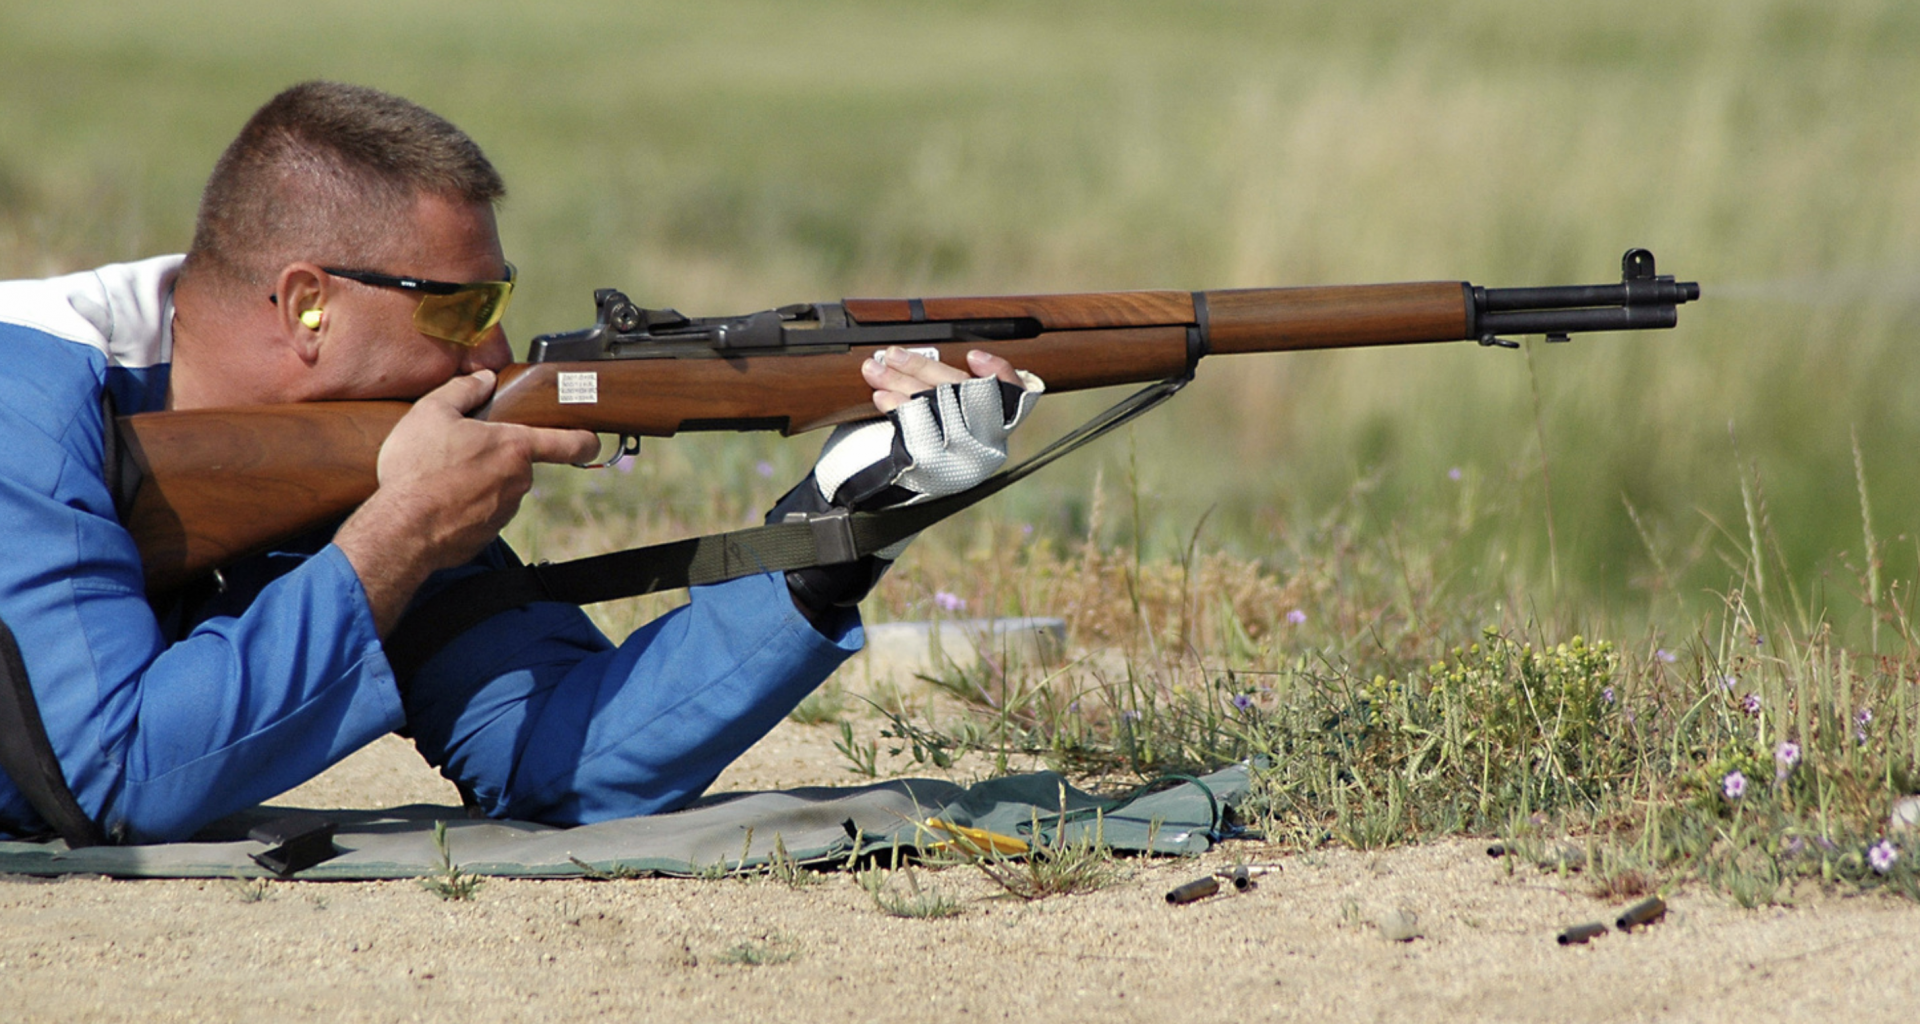
The prone position is almost as sturdy as the benchrest shooting position. Benchrest offers a steady platform for firing off shots, while prone provides stability through body and ground contact. This position allows for a motionless sight picture achieved through three good positioning elements being bone support, muscle relaxation, and a natural point of aim.
The bone support and muscle relaxation allow the rifle’s weight to be shifted from bone to bone, and then to the ground, without requiring any specific muscular effort similarly to standing that doesn’t require conscious effort. While there may be some reasonable variations based on different factors, the perfect prone position embodies basic principles using the three main elements.
The basic principles of the prone position can be grouped into (1) left arm and hand, (2) right arm and hand, (3) legs and spine, (4) head and neck. Let’s work our way through each group starting with the left arm and hand.
Left Arm and Hand
Left Elbow Position
The left elbow must be fully extended to the left of the rifle and should not be used as the enabler for setting a high or low position. A high prone position is when the left hand and whole body position is higher off the ground compared to the lowest possible legal position. Every shooter must know and adhere to the rules for every position. The last thing you want is an interruption from a match official while firing off a string of shots.
The shooter must not fully extend the left elbow to drop the position nor draw the elbow in closer to the body to raise the position. The left elbow is the anchor point and everything else needs to be adjusted and oriented around this.
Sling Position and Configuration
The sling creates a triangle with the upper left arm and left forearm when it runs from the upper left to a point on the rifle that’s near the left hand. The sling has to transmit the weight of the rifle to the upper left arm bone, which removes the need for the left arm muscles to hold the weight. The sling material should not stretch yet be as wide as the rules permit. If the sling can stretch, it gives too much creep of the position making it difficult to hold without applying muscular effort.
If the sling isn’t adjusted snugly or held in place, it will slip down the upper arm affecting the position or affect the blood flow. Shooting jackets typically have a strap or hook for this purpose. Do not place the sling in the middle because it can compress the brachial artery between the sling and the bone. A high prone position works well with the sling high on the arm and a low position works better with the sling low on the arm.
Extend the sling in a straight line from the upper arm on the inside of the left wrist, which makes it pass flat under the wrist and at the back of the hand to the contact point on the rifle. Don’t wear a wristwatch and if need be, adjust shooting jacket cuff under the sling to avoid any sustained pressure.
The Hand Stop / Sling Swivel
The prone position must work around the fixed sling swivel on a service rifle as the sling length and position height are mostly controlled by this fixed point. Arrange the adjustable hand stop to equalize the distance from the rifle butt to the trigger with the distance between the trigger and the hand stop.
The hand stop position and sling length controls the shape of the triangle mentioned above discussed earlier and raises or lowers the position. Don’t manipulate these adjustments to set a high or low position, instead find a stable position that’s labeled high or low. In the prone position, every single element will affect all the others.
The Left Hand
Both the hand and wrist must be straight because bending engages extra muscles and creates a springing motion that influences recoil. Additionally, don’t hold the rifle with the left hand fingers as any force applied by the left hand affects the recoil between shots, which ultimately affects the bullet impact on the target. It’s important not to develop the unconscious habit of fingering the rifle the last bit onto the target while aligning the sights and while it may feel and look clean, it will off aim. When the trigger releases the fingers relax letting the rifle spring back to the true natural point of aim.
BONUS OFFER: Get your free shooting range targets to print at home!
Get your free targets to print at home!
Right Arm and Hand
The Right Elbow
The right elbow position is controlled by the rifle’s position. The elbow moves to the rifle, the rifle is not moved to compensate for the elbow. First hold the rifle using the right hand and then place the right elbow and keep the right arm relaxed so you’re not engaging muscles to push or pull into position. The right elbow should not move so a shooting mat or an elbow pad to increase friction.
The Right Hand
The right hand grip must be firm, but the fingers mustn’t be too tight to keep the hand in place on the rifle. If it’s the grip is too loose, the whole hand will close when the trigger is pulled causing the rifle to move off target. Practice the technique so when the trigger is pulled straight back, the sights are not disturbed. The right hand position should allow movement of the trigger finger without touching the rifle stock. When the finger makes contact with the stock while pulling the trigger, it’s known as dragging wood, which prevents pulling the trigger straight back without disturbing the sights.
The Right Shoulder
The butt plate must be positioned as close as possible to the neck to ensure sufficient contact with the shoulder. The more contact there is will prevent the rifle from sliding around and avoids the need for constant adjustment. The amount of pressure on the butt plate must be the same as the pressure on the hand stop, and this can be corrected by changing the length of the stock instead of changing the hand stop’s position or the sling’s length.
The hand stop position and sling length are used to tweak the height of the position and front sight. When there’s not enough pressure on the butt plate it results in weaknesses throughout the prone position. Both the right shoulder and upper body must be as close to the ground as possible.
The Legs and Spine
The spine must be relaxed yet straight with the left leg lying parallel to spine and the left foot toe is pointed in towards the position. The right leg must be up at a 450 angle, so the lower part is parallel with the left leg and the right foot toe is pointed out and away from the position.
The right leg angle controls the connection of the right shoulder to the position’s center and with the up and down chest movement, it regulates the effect of breathing. Experiment using the right leg with a range of motions and using video recording with help with analyzing the position. A stable right leg position provides the least disruption of the front sight from pulse beat.
Head and Neck
The Head Position
The top of the cheek-piece should be aligned with the axis of the bore and is adjusted so the head can rest naturally without straining the muscles in the shoulder or neck. The head position must be relaxed and natural so the shooter can look through the sights without there being any obstruction between the bridge of the nose or eyebrows.
Whenever the head is positioned on the cheek-piece, the position and relative size of the front sight as seen through the rear sight should appear the same. In recoil physics, when the head is held up off the rifle with the first shot to align the sights and in the next shot, the head is pressed down firmly, the recoil will be different. Alternating cheek pressure results in a different recoil affecting the shots on target.